One of our favorite dinners as a family is Taco Pie. Last week our friend and neighbor Steph who has 3 young boys was looking for a new dinner idea and Chelsea told her about Taco Pie. We hadn’t made it in a while and I was reminded by her and her family how delicious it was, so we brought it back on our weekly menu.
I love it for many reasons. It’s healthy and delicious, loaded with plenty of veggies and lean protein. It can be made beforehand and reheats easily. Everyone in the family enjoys it and it’s something different that you don’t see everyday. It can also be made gluten free, which is important for me since Matteo and Chelsea both have a gluten allergy.
This delicious dinner came to us from our dear friend Peggy Curry. She wrote an amazing cook book called Damn Good Gluten Free.
I was actually with her during the time when she was getting all of the photos taken for it and putting it together. I got to help her make some of the dishes and even got a few pictures of myself with her delicious food in her beautiful cookbook.
It was one of those blessings that comes from a seemingly unfortunate situation. I had been unceremoniously fired from my job of 7 years, a week before Christmas, with a 3 year old and a 9 month old. I wasn’t worried, as I have been fired before and it always worked out fine. So I knew something better was coming. Since I wasn’t working, I was able to spend my days with Peggy and Laura Dart, her incredible photographer and help out with the making of the cookbook.
Then, long story short, covid happened, they closed the yoga studios and the beach and we moved to Tennessee.
In fact 17 years ago today, I was fired from my well paying corporate sales job and it ended up being the best thing for me. From that place, I pivoted and decided to follow my heart. I became a surf instructor, bartender, sous chef, yoga teacher, met Chelsea, became a dad, etc.
Now, back to this Taco Pie…
First gather all of the ingredients. I use organic if possible. You will need:
Can of refried beans
Mexican cheese
Onion
Bell Pepper
Zucchini
Frozen corn
1 lb Ground Chicken or Turkey
Salt, Pepper, Taco Seasonings of your choice
Ketchup
3 Gluten Free Tortillas
Directions: Preheat oven to 350
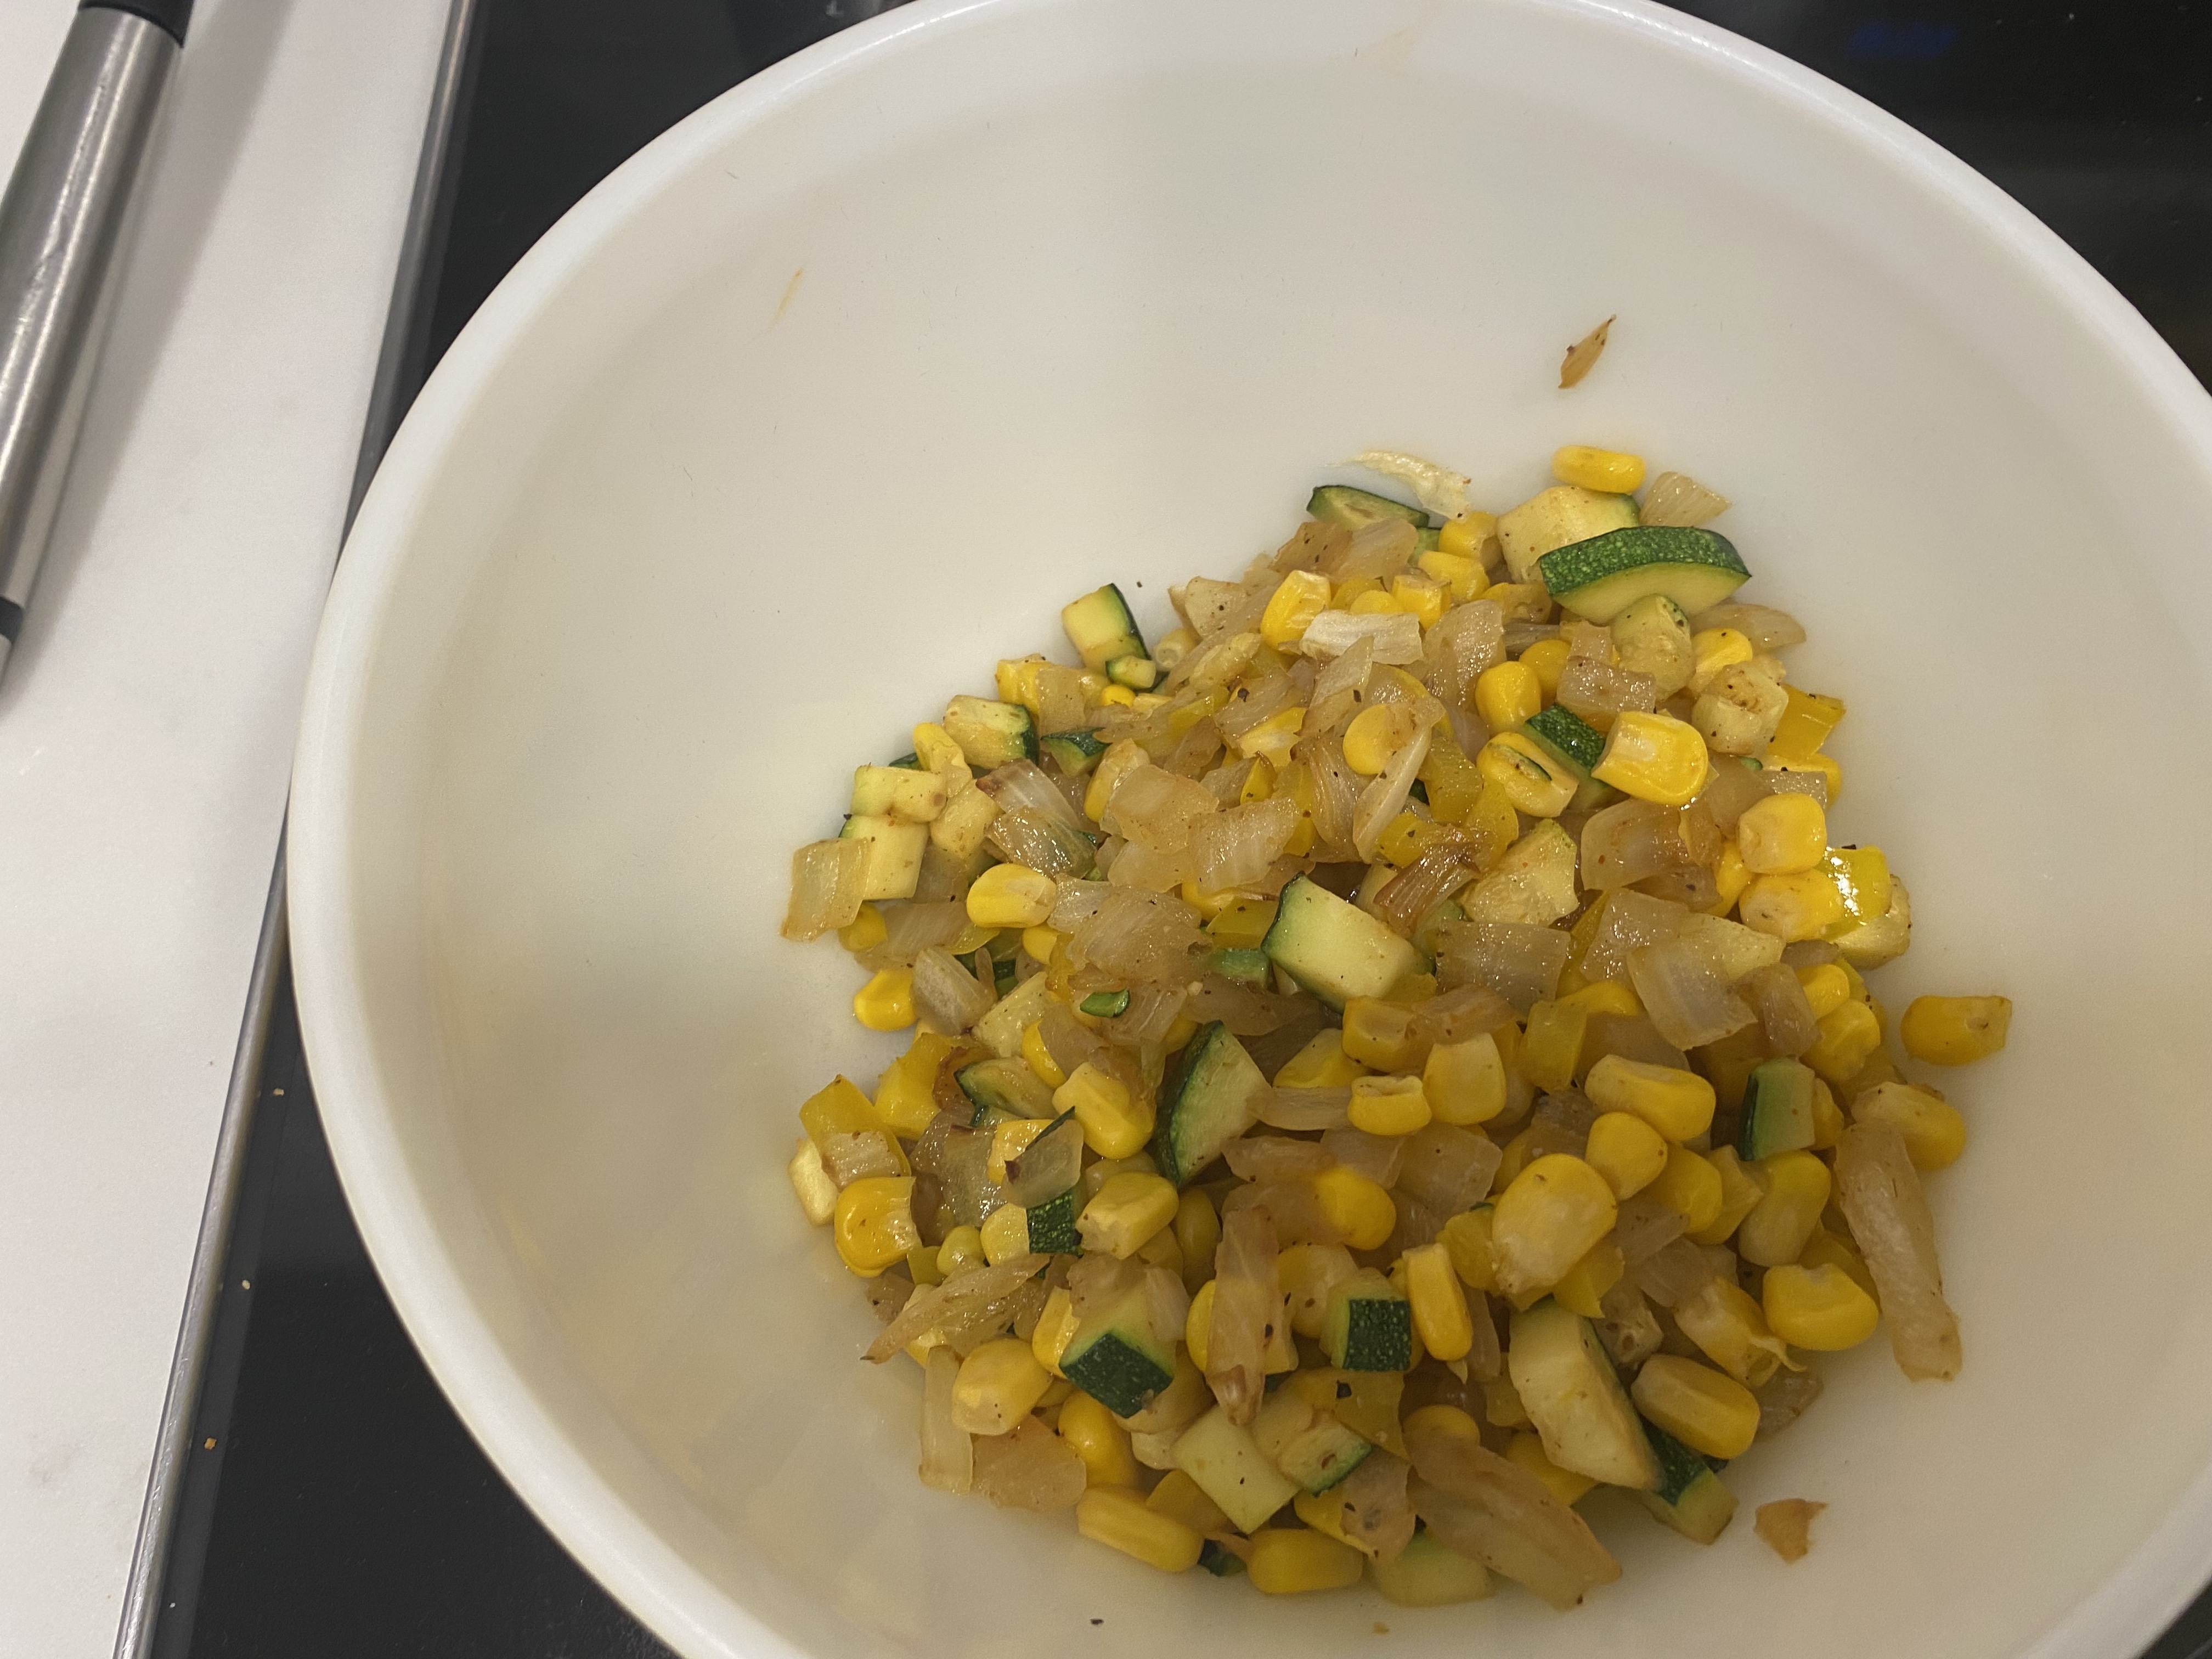
Step 1: In a large skillet (I use cast iron) add olive oil and cook down onions, then bell peppers, then zucchini. Add salt, pepper and some of the taco seasonings to the veggies as they cook. Cook for a few minutes to get a little char on the veggies and then add the corn. Take the veggies out and set aside in a bowl.
Step 2: Next add a little more oil to the pan and add the ground meat and season with salt, pepper and the rest of the taco seasonings. When the pink is gone add ketchup. Mix around and cook on low for about 10 minutes to let the ketchup and spices absorb into the meat.
Step 3: While the meat is cooking, you can prep the tortillas. I have found with the gluten free tortillas that it is helpful to bake them for a couple of minutes first so they are not as soggy.
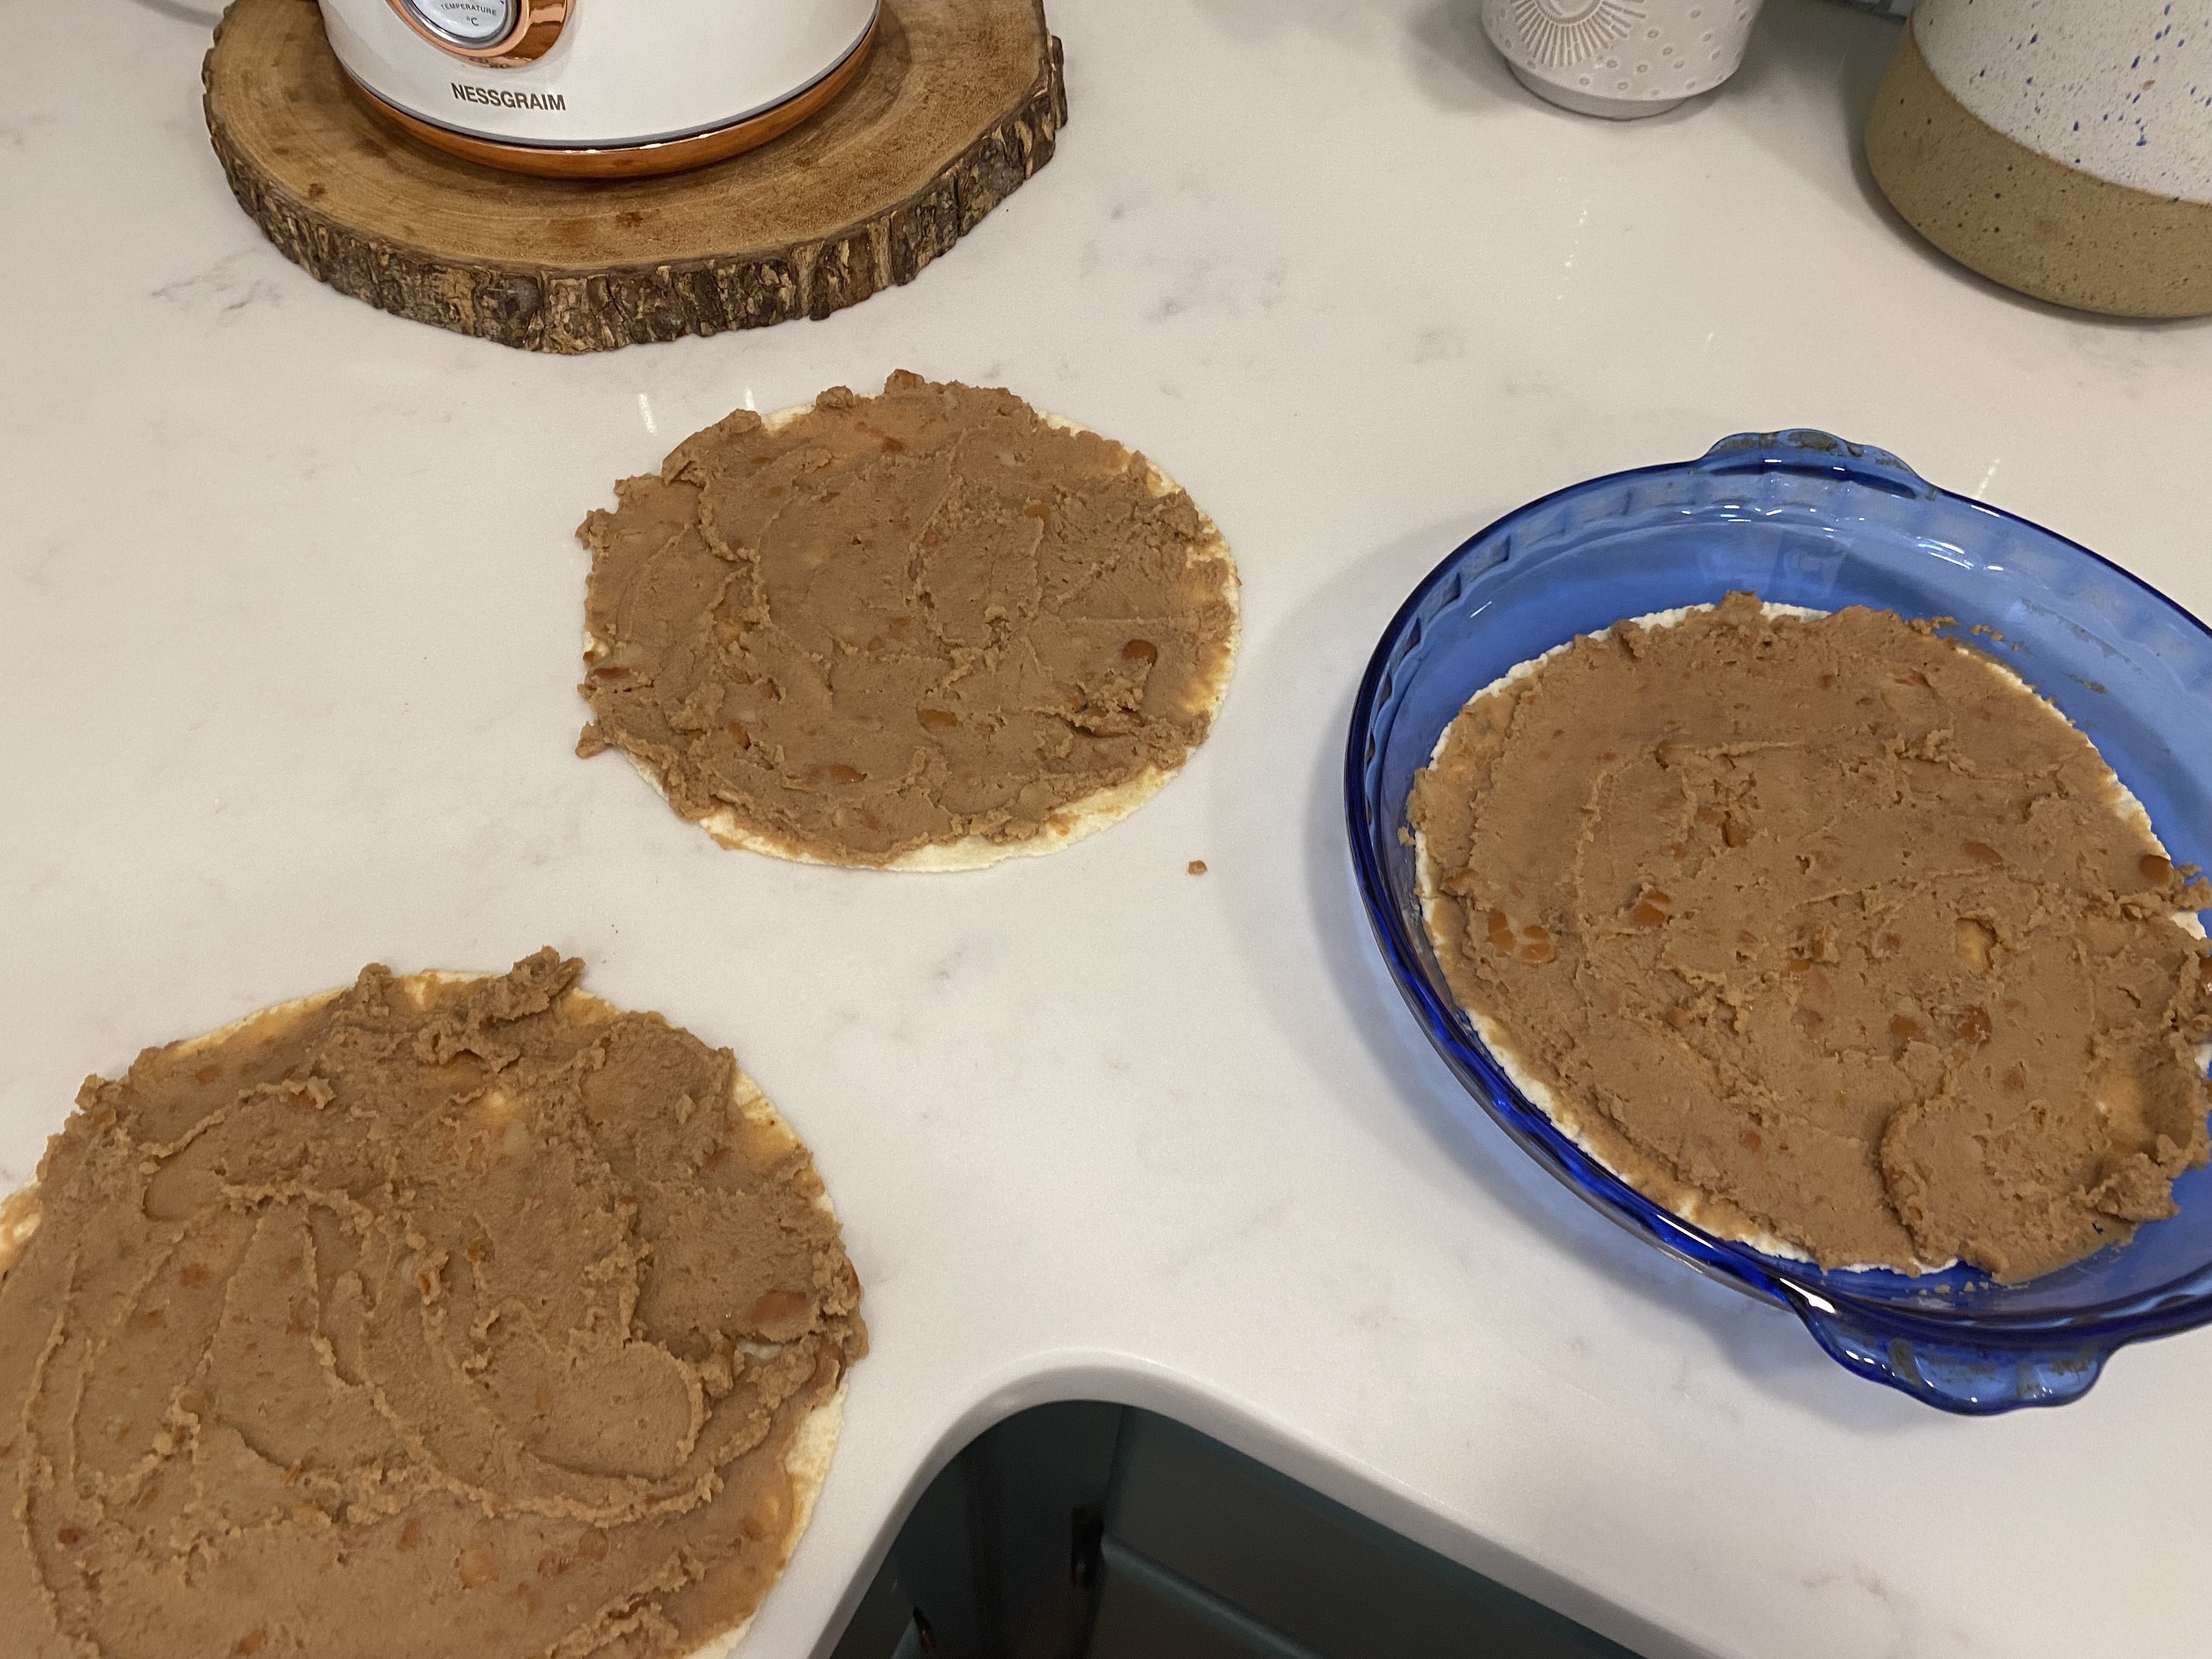
Step 4: Add 1/3 of the refried beans to each of the tortillas.
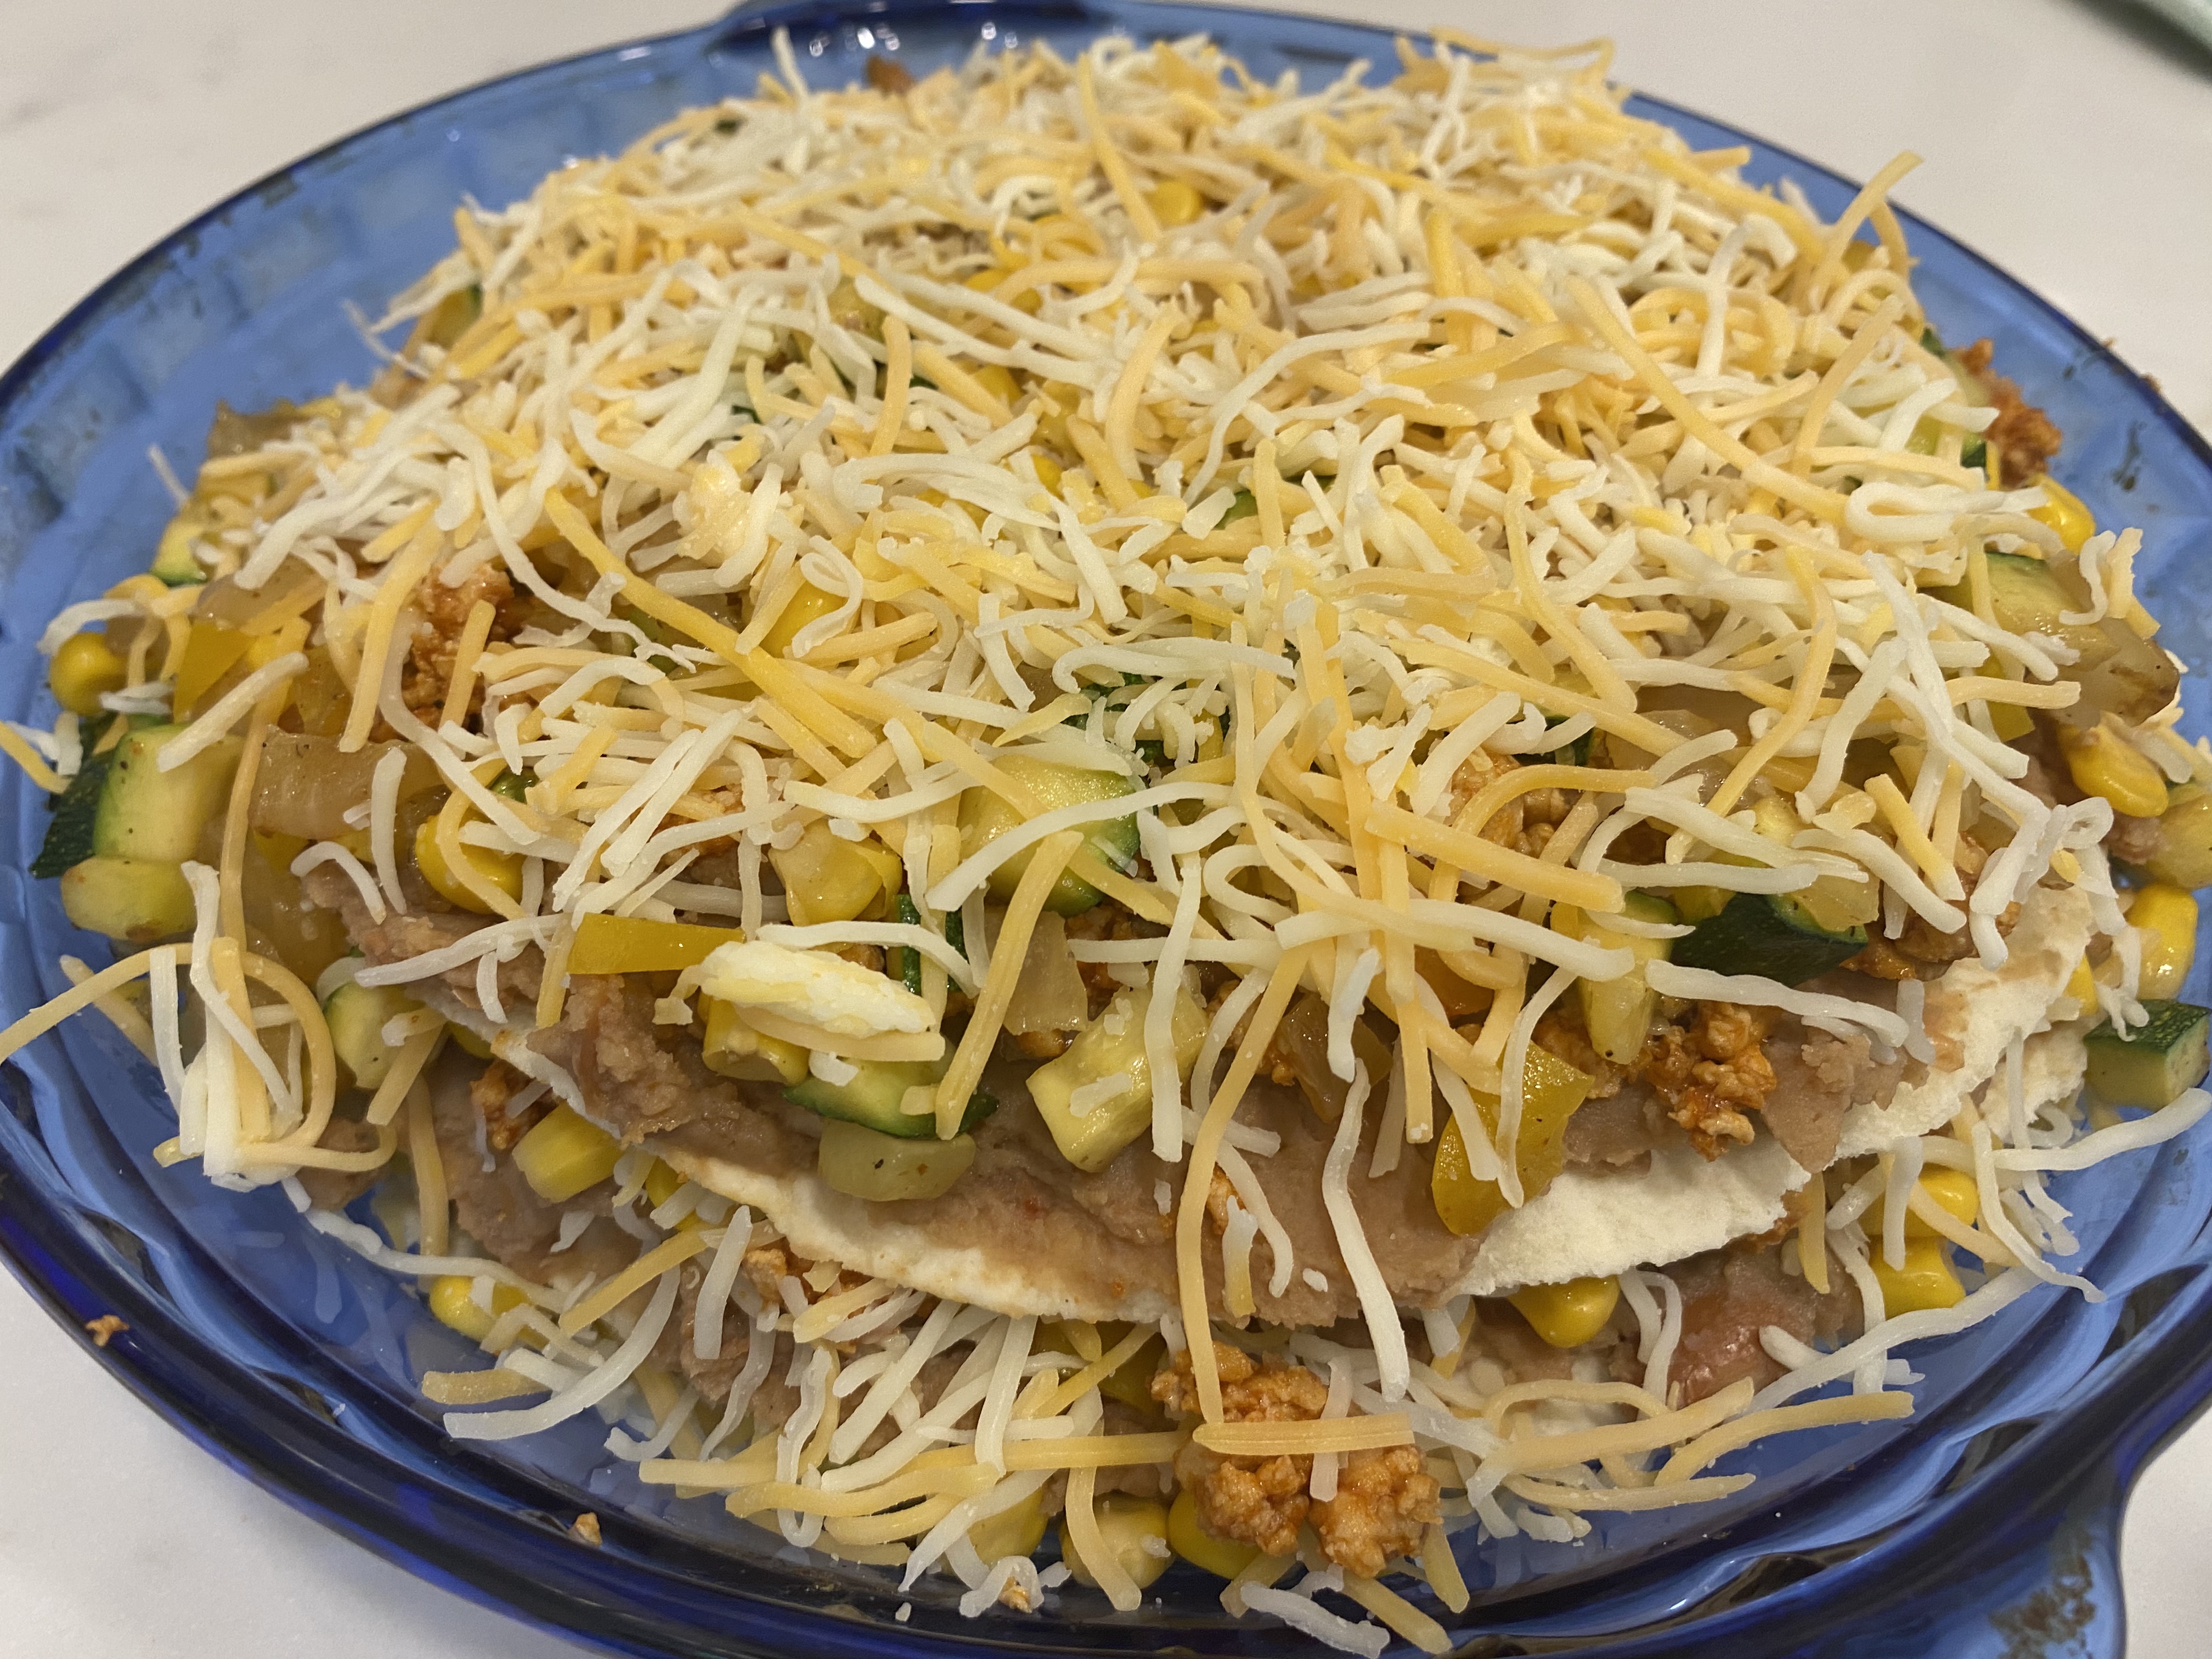
Step 5: Place the first tortilla with the refried beans in the pie dish. Then add 1/3 of the veggies and 1/3 of the meat to the tortilla. Sprinkle on cheese and then repeat two more times building the pie into 3 layers.
Once everything is assembled you can cover and save in the fridge for later, or bake at 350 for 20 – 30 minutes or until cheese is melted and the tortillas are at your desired crispiness…Enjoy
A couple of months ago I realized that I have been making and enjoying my own kombucha for the last two years now. I know it was two years, because I was bartending at the time in downtown Nashville at Pinewood Social, when a fellow employee and I were talking about kombucha. She had been making her own for the past little while and had an extra SCOBY. She offered it to me and I eagerly accepted.
I had always wanted to make my own kombucha, but I had no idea how to do it. Chelsea had made it back in the day when she lived in Hawaii, but didn’t really have the desire to do it again. I loved the health benefits of kombucha and the fizziness and the different flavors. I don’t drink sodas, except for plain soda, so this gives me something fun to drink that’s actually good for me.
The hardest part in my mind to making your own kombucha was getting the SCOBY. Kind of like getting a queen bee for your bee hive, its essential. SCOBY stands for Symbiotic Culture of Bacteria and Yeast. It’s the fermentation starter that kicks off kombucha fermentation.
So now that I had my queen, I needed to learn how to take care of her and actually make the kombucha. Sure, I could watch some youtube videos and learn everything I needed to know from the internet, but I’m more of a hands on type of person when it comes to learning tactile things. I want to see it in action and talk about it and ask questions and all of that helps me understand and remember it.
Well it just so happened that our dear friend Shann, (Shannon Larsen) and her boyfriend, now fiancé Zander, (Alexander Puentes) came to visit us. Zander had been brewing his own kombucha for years and even made a PDF on how to do it. I still reference it to make sure I’m doing everything right.
He walked me through the steps and I am sharing those with you in this blog post and in the youtube video my kids and I made last year. Brewing your own ‘booch’ is a little bit of a process and takes some time. Not too much, but there are a few steps you need to remember.
Click on the video to see how we make it.
A SCOBY is a living organism that continues to grow. It is also called “the mother” because it will eventually have “babies”. These can be given away, like my friend did for me and like I have done for several neighbors and friends over the last couple of years. Or they can be saved or used to make multiple batches. Mine is getting really big at the moment and I am hoping it will split off soon so I can have another one and make more. Each batch gives me 5 pint sized glass bottles of kombucha. So if I can have two going at once, then we can have plenty to both enjoy and share with friends.
I love giving away my kombucha to friends. When I find out someone is into it, I’ll give them a bottle. It’s so fun to say, here you go, I made this. Enjoy. Then you know it’s going to taste good and be good for them. How awesome is that? If they’re really into it, I’ll offer them one of my SCOBY offspring and they can start to make their own.
Last Summer I had two SCOBY’s going and we went on vacation. When we came back, fruit flies had gotten into one of them. So I had to let it go. Fortunately I had the second one, which I am still using today.
I try to make a new batch every 10 days or so, but sometimes I’ll get out of the habit and it sits for a couple of weeks and that’s ok. The SCOBY just keeps on livin’.
We use our ‘booch’ a few different ways.
In the morning for breakfast, I pour a little shot for the boys. To get them some healthy probiotics to start the day.
I also make popsicles with it and we enjoy these in the afternoons.
Finally at night, when I’m craving a drink besides water and don’t want to drink alcohol, then a little kombucha and soda over ice is a satisfying mocktail.
I love finding healthy things that the whole family enjoys. It also feels good to be able to make this on my own. I know where it comes from. Me, my kitchen. I’m putting my positive energy into it when I make it. I love doing it. It’s fun to make things, I love drinking it and it’s good for me. So it seems like it’s one of those beautiful things that hits on all levels. If you want to give it a try and make your own, go for it. If you find yourself a SCOBY, then check back here for what to do next. Here are the steps that I learned from my friend Zander with my own personal modifications.
First, bring 6 cups of water to a boil. Remove from heat, then, add 6 -7 bags of black tea and steep for 30 minutes. Squeeze and remove the tea bags and add 1 cup of organic cane sugar. Stir until dissolved.
Now fill your pitcher with 8 cups of filtered water. Add the hot tea. The temperature of the tea should cool to under 100 degrees.
Add the 2 cups of the starter liquid that came with your SCOBY and stir with a wooden spoon, (it doesn’t like metal).
Now add the SCOBY.
Cover with a cloth and use a rubber band to keep it on. This will keep out fruit flies or any other bugs, but still allowing the SCOBY to breathe.
That comes up to a total of 16 cups of liquid, which is one gallon or 128 ounces. So make sure you have a gallon size glass container to keep your brew. You also want an opening at the top of at least 3 or more inches so your SCOBY can grow and breathe.
That’s it! Now you just have to wait. Anywhere from 7-21 days, depending on several factors, but I’ve found that 10 days is the sweet spot for me. The temperature has a lot to do with it. We keep our house pretty warm and I place it in a cabinet. You can start tasting after 5 days and when it seems ready to you, then it’s time to move on to the 2nd Ferment
The Second Ferment is the fun part where you get to flavor your kombucha. There are many different flavors and recipes out there, but we usually just keep it simple and do Lemon and Ginger.
This is the flavor that my wife and kids like the best. I will often experiment with different flavor combinations, depending on what fruits are in season and what we have at the house at the time of the 2nd ferment. But Lemon and Ginger always seems to be the best.
Before you put the kombucha in the bottles, be sure to take out the SCOBY and 2 cups of the liquid and put it into a glass container. Cover this with a cloth and rubber band like you just did before and now you have your starter for the next batch. You can get started and make another one right away, going back to step 1 and boiling tea or simply let it sit in your cupboard for up to a month or more. Give it a stir every week or so, just to keep it happy.
Today I did 5 bottles of Lemon/Ginger and 1 bottle of the Lilac syrup that we made from our lilac bushes that were blooming this week. They only bloom for a couple of weeks a year, so I thought, why not give it a try.
If you have a juicer, you can experiment with different flavor combinations and see what you like the best.
For the lemon and ginger, all I do is peel the ginger with a spoon, then dice it up into little chunks and drop 4-5 little cubes into the bottle. Then I will squeeze the juice out of 1 lemon and then evenly distribute it in the 5 bottles with the ginger.
Once you have your flavor in the bottle, add the kombucha to the bottle and fill it almost to the top, leaving about an inch of air. This helps the carbonation process. Put the cap on and turn it over a couple of times to mix up the ingredients.
All you have to do now is wait a few days and your brew will be ready to go. 3 days seems to be the sweet spot for me. By having the bottles capped, the CO2 has no way to escape, so this creates natural carbonation. When they have reached your desired carbonation, then put them in the fridge and enjoy. Refrigerating the kombucha will pretty much stop the carbonation process. The longer you leave them out of the fridge, the more carbonated they will get, but they will also get more sour. So again, depending on your preference, find your sweet spot.
Apparently, if you leave them out too long, they can explode. Although I’ve never had this happen to me or anyone I know, I have had them give out quite a ‘pop’ when I burp them after they’ve been fermenting for more than 3 days.
Ok, there you go. Have fun and enjoy. There are so many health benefits to drinking kombucha and so many different ways to enjoy it. I’d love to hear about your experience. Cheers!
Our whole family loves curry. Which is interesting because I never had it growing up. My mom and grandmother were pretty traditional “Southern” cooks. So everything had lots of butter and was very protein and carb focused. I ate this way or my own variation of it until I found the yoga path. Then I began to focus more on the vegetables and less on the meat and carbs. Chelsea and I have been making curry since we first met 10 years ago. She had just moved here from Hawaii and had this cookbook from a Vegan chef named Todd and we have used his recipe as a base all these years. It is the one thing we have consistently eaten every week or two since we’ve been together. Now both our boys, Matteo (4) and Owen (1) eat and love it too.
Many cultures and traditions have a variation of curry, but not really America. So when I introduced my parents to it, they hadn’t had anything like it before. We traveled a lot as a family growing up, so we sampled a lot of different delicacies from our travels. However, most of our trips were within the United States, Canada, Mexico and Europe. Fun fact, I have been to every state except Alaska and Montana. Although there are many options for curry in North America, when we would travel we usually ate at the places known for having a good steak or maybe ribs and I didn’t see curry on too many of those menus. Even though I’ve been to nearly every country in Europe, I haven’t really heard of a German curry or an English curry or even an Italian curry. I’ve found that most people (myself included) don’t travel outside of their culinary comfort zones.
Nowadays I sample different curries whenever I have the chance. I love curries from Thailand, India, Africa and Japan, but the one I make at home is almost always the same, because it is so consistently delicious and everyone I have served it to seems to love it. So I call it the Love Curry. According to Chef Todd’s recipe it’s an Indian vegetable curry.
The reason I call it the Love Curry, is that whenever we have a friend or a family that we know that is going through a challenging time, we make a big batch and eat some our selves and give some to the family in need. A lot of times its a family who just had a baby, but this last time it was a family who had someone in the hospital for a few weeks and he was just coming home. So Chelsea offered to make them dinner. As soon as she told me I said, let’s make curry!
It’s easy to make, it just takes a lot of prep, which I love. When I’m chopping the vegetables, I think about who I’m making it for, even if it’s just Chelsea and the boys and I put love into it. Now that may sound strange to some of you and it would have to me back in the day, but as I’ve found a love for cooking and talked to some of the most amazing chefs and watched chefs on cooking shows, I hear it all the time. The best chefs in the world talk about putting love into their food. I truly believe you can taste the difference between food that was made with love, versus food that wasn’t.
I wanted to share the recipe here so anyone who knows someone or a family in need or maybe a nurse or single mom, could make them some Love curry and enjoy some themselves. Or maybe you just want to show some love to your self or your own family. Either way, here is the recipe.
I usually make a lot of it, so I would cook it in a Dutch oven or the biggest pot you have. I prep all the vegetables first, because I think it makes it easier when putting it all together.
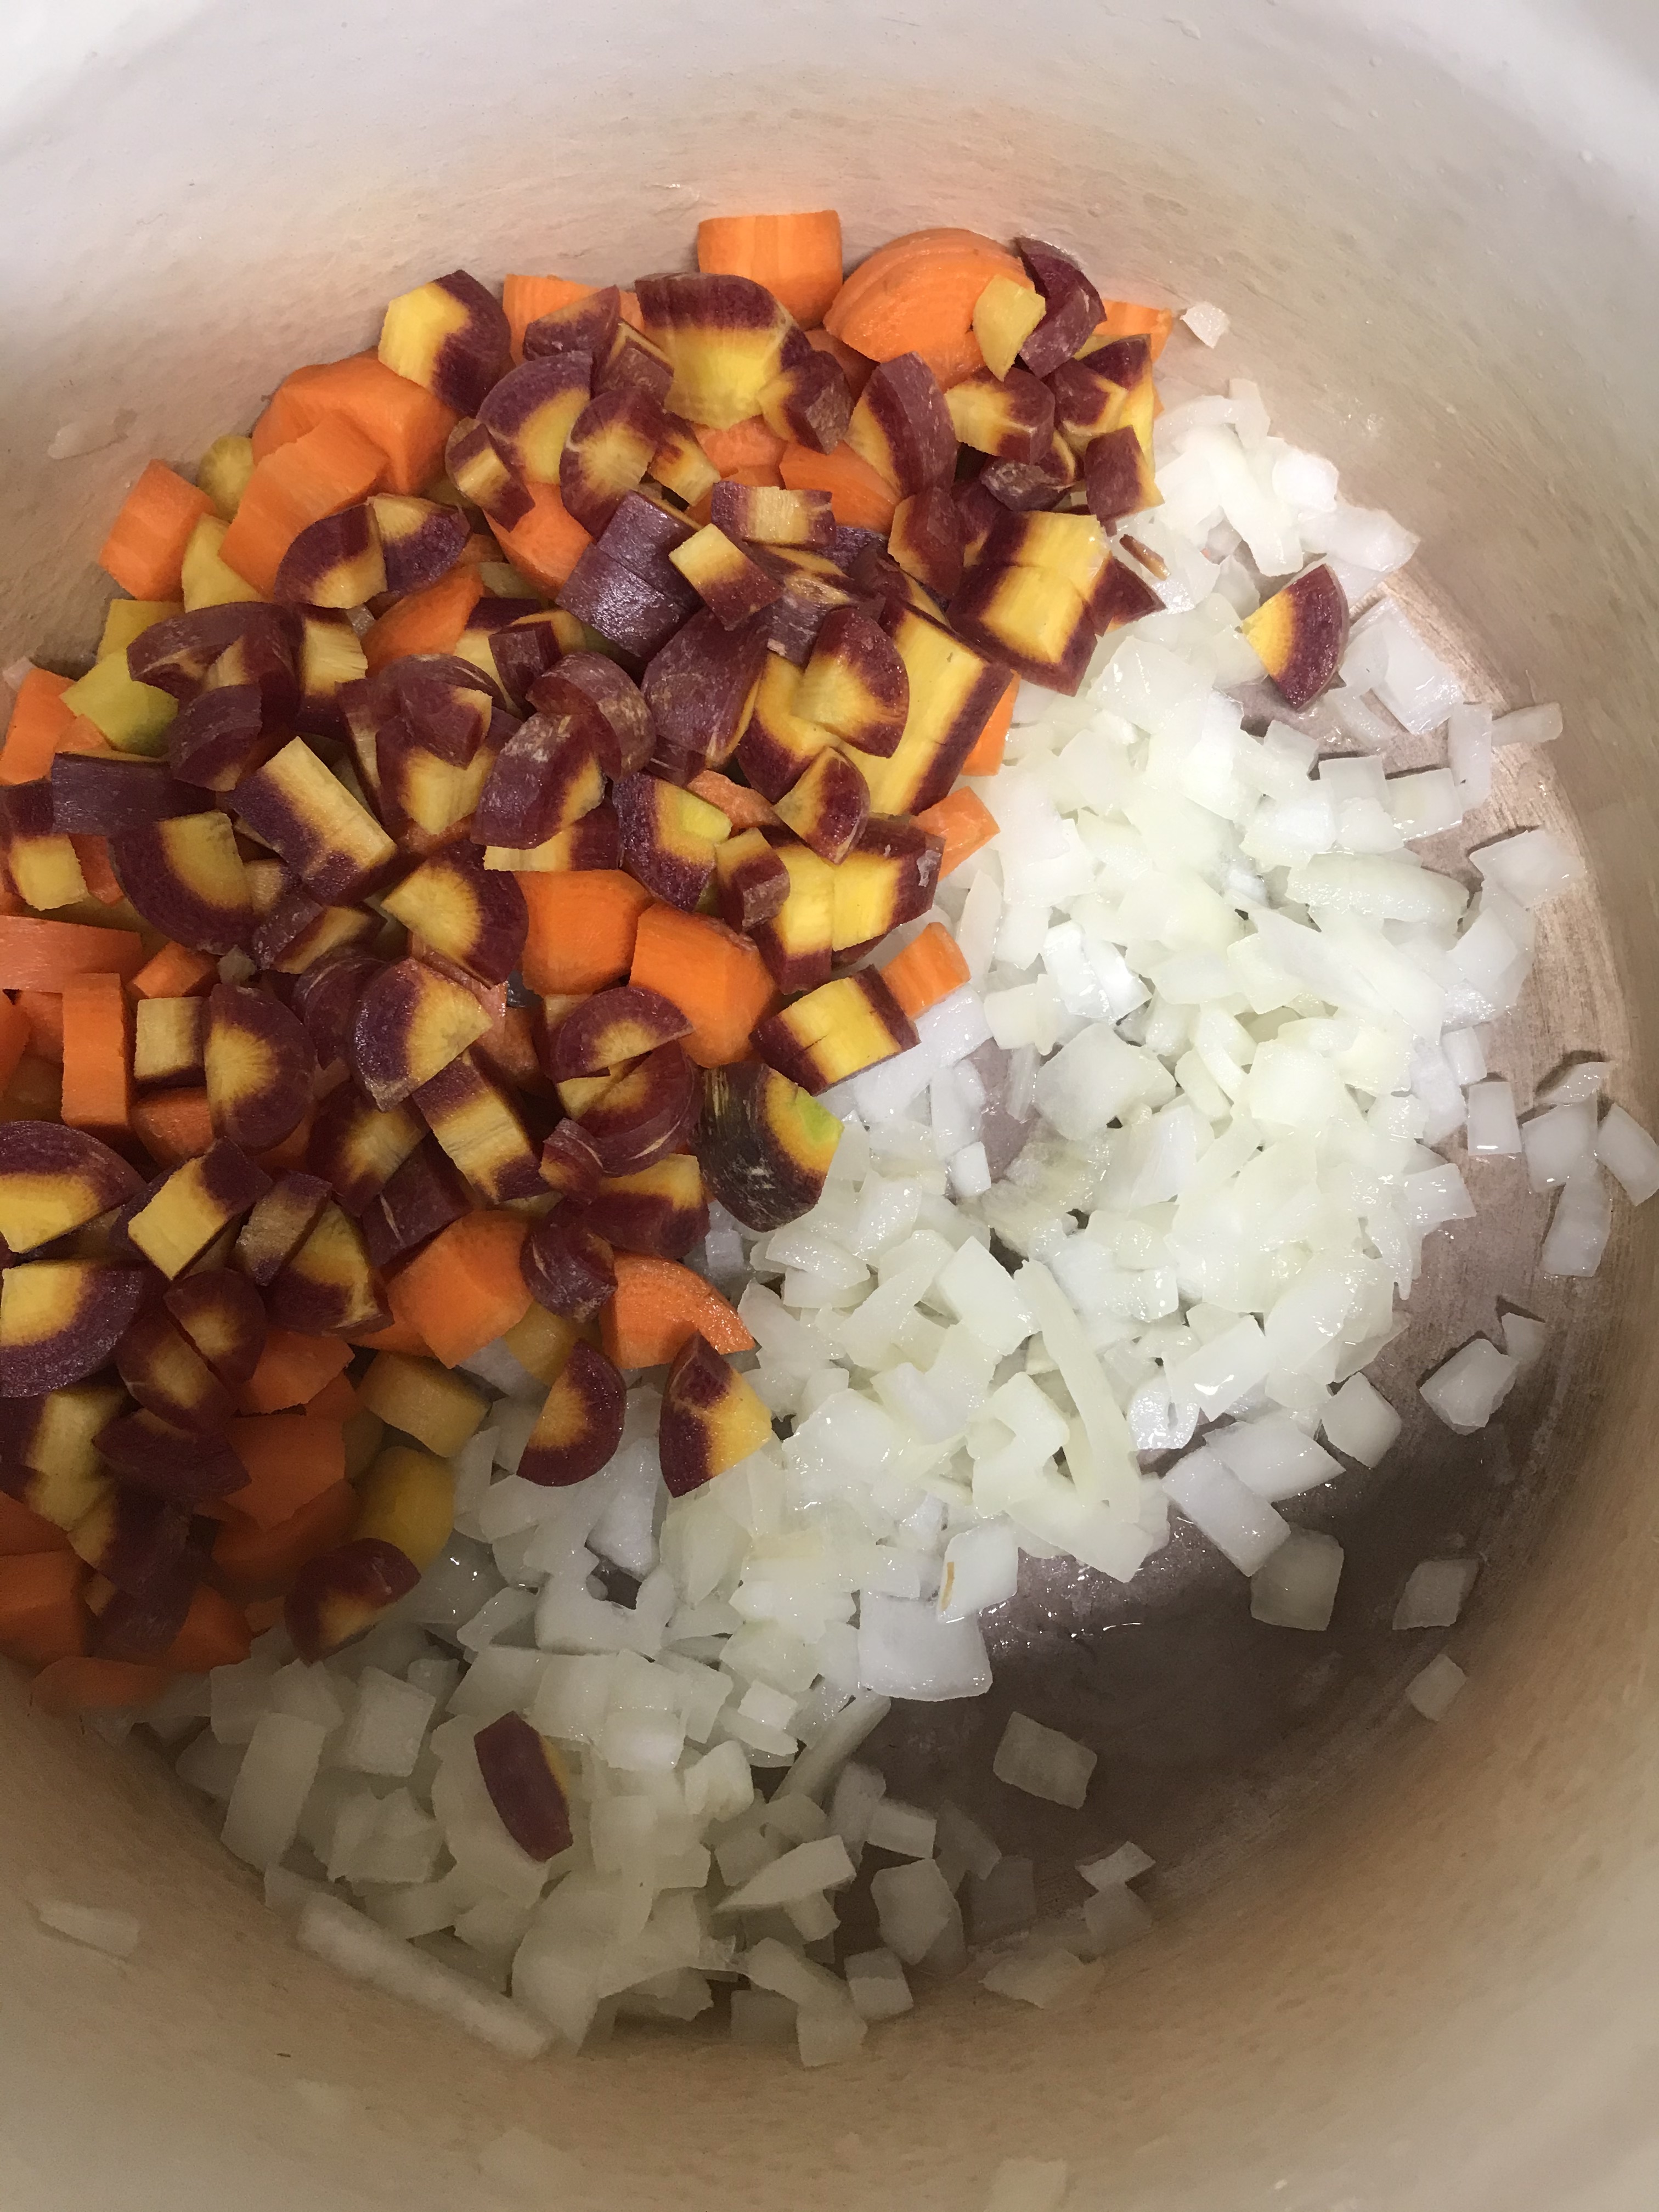
You will need Coconut oil, coconut milk, salt, curry powder, turmeric, ginger, onion, carrots, sweet potato, potato, butternut squash, cauliflower, green beans, peas and cashews.
First, heat the coconut oil in the pot and add the onions, then the carrots.
Then add the potatoes, sweet potatoes, butternut squash, and grate the ginger.
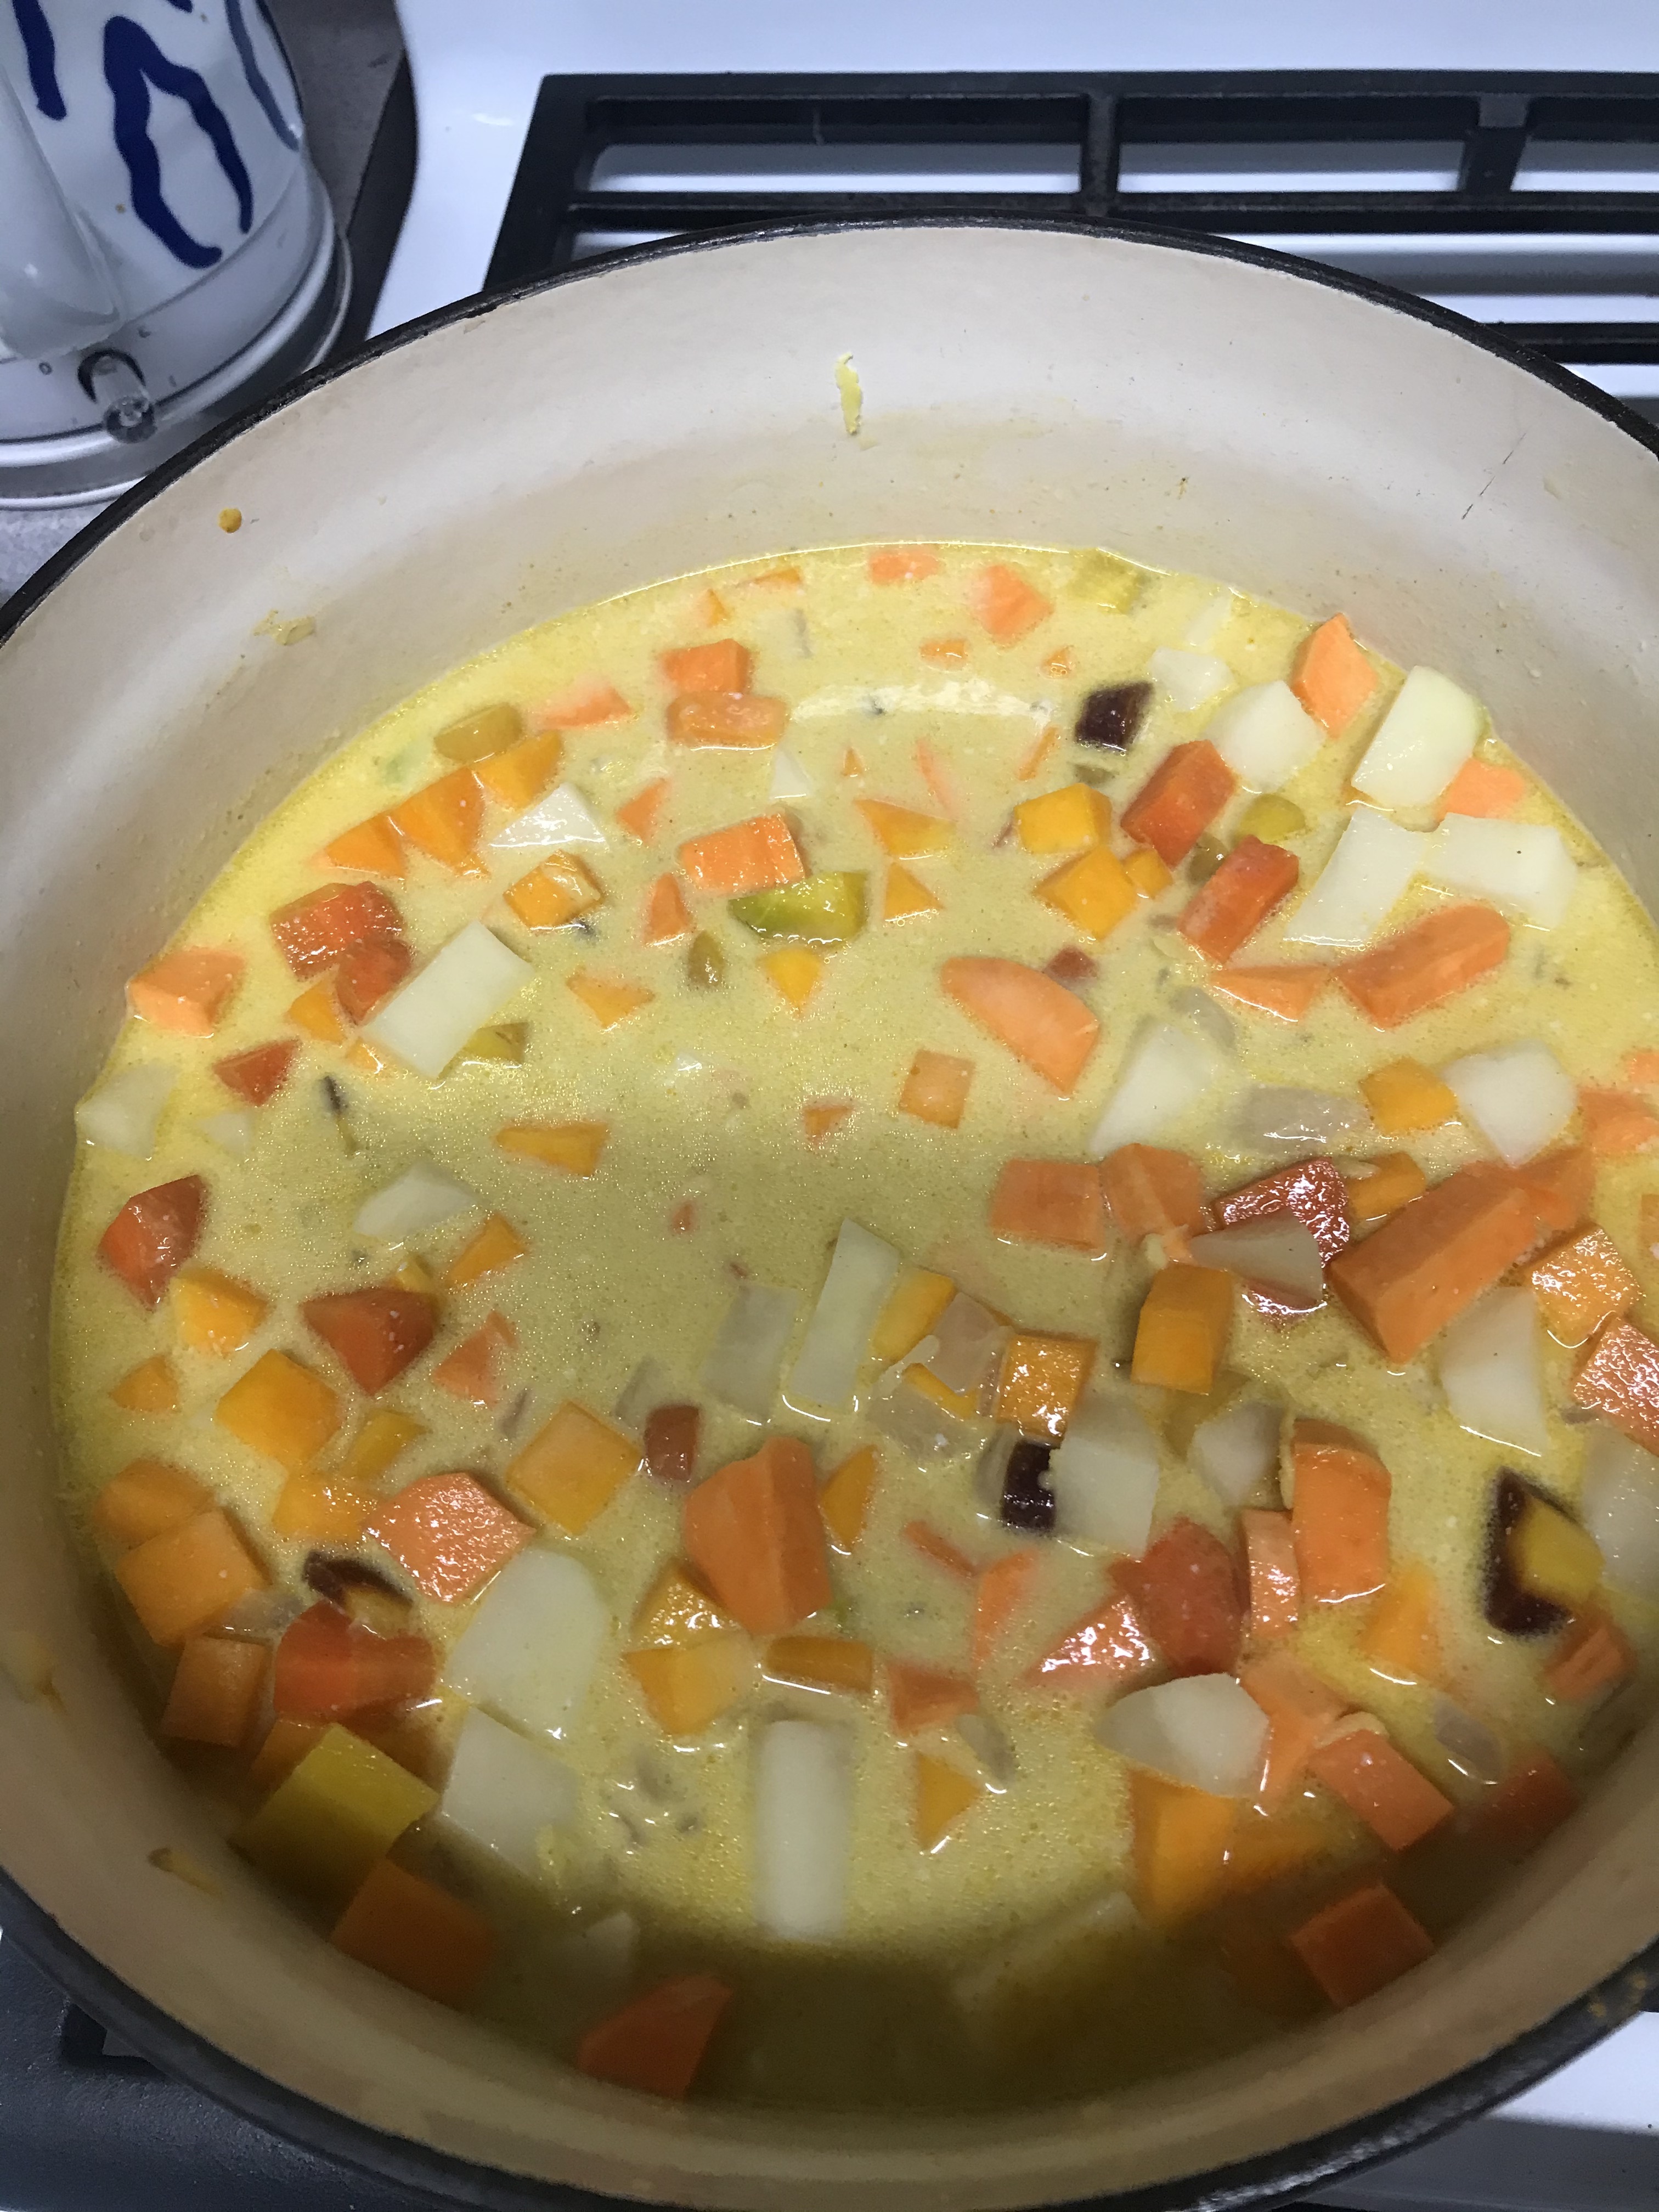
Next, add the coconut milk and spices including salt. Cover and cook these vegetables for about 20 minutes until soft.
Finally add the cauliflower, peas and green beans and let it all simmer together. 45 minutes is ideal, but it can be done in 30. The longer the better in our opinion, so all the flavors can meld together. At the very end, right before I serve it I add cashews. This gives it a perfect little crunch.
So you’re getting 7 or 8 vegetables and it’s healthy, filling and delicious. We have it over either quinoa or basmati rice. It’s also great the next day as leftovers.
Tuesday night is Dad’s night. Chelsea teaches a prenatal yoga class and doesn’t get home until after I’ve put Matteo to bed. So once she leaves for class, it’s Dad’s night. After walking around the neighborhood looking at all the Holiday lights, we came home and cooked dinner together.
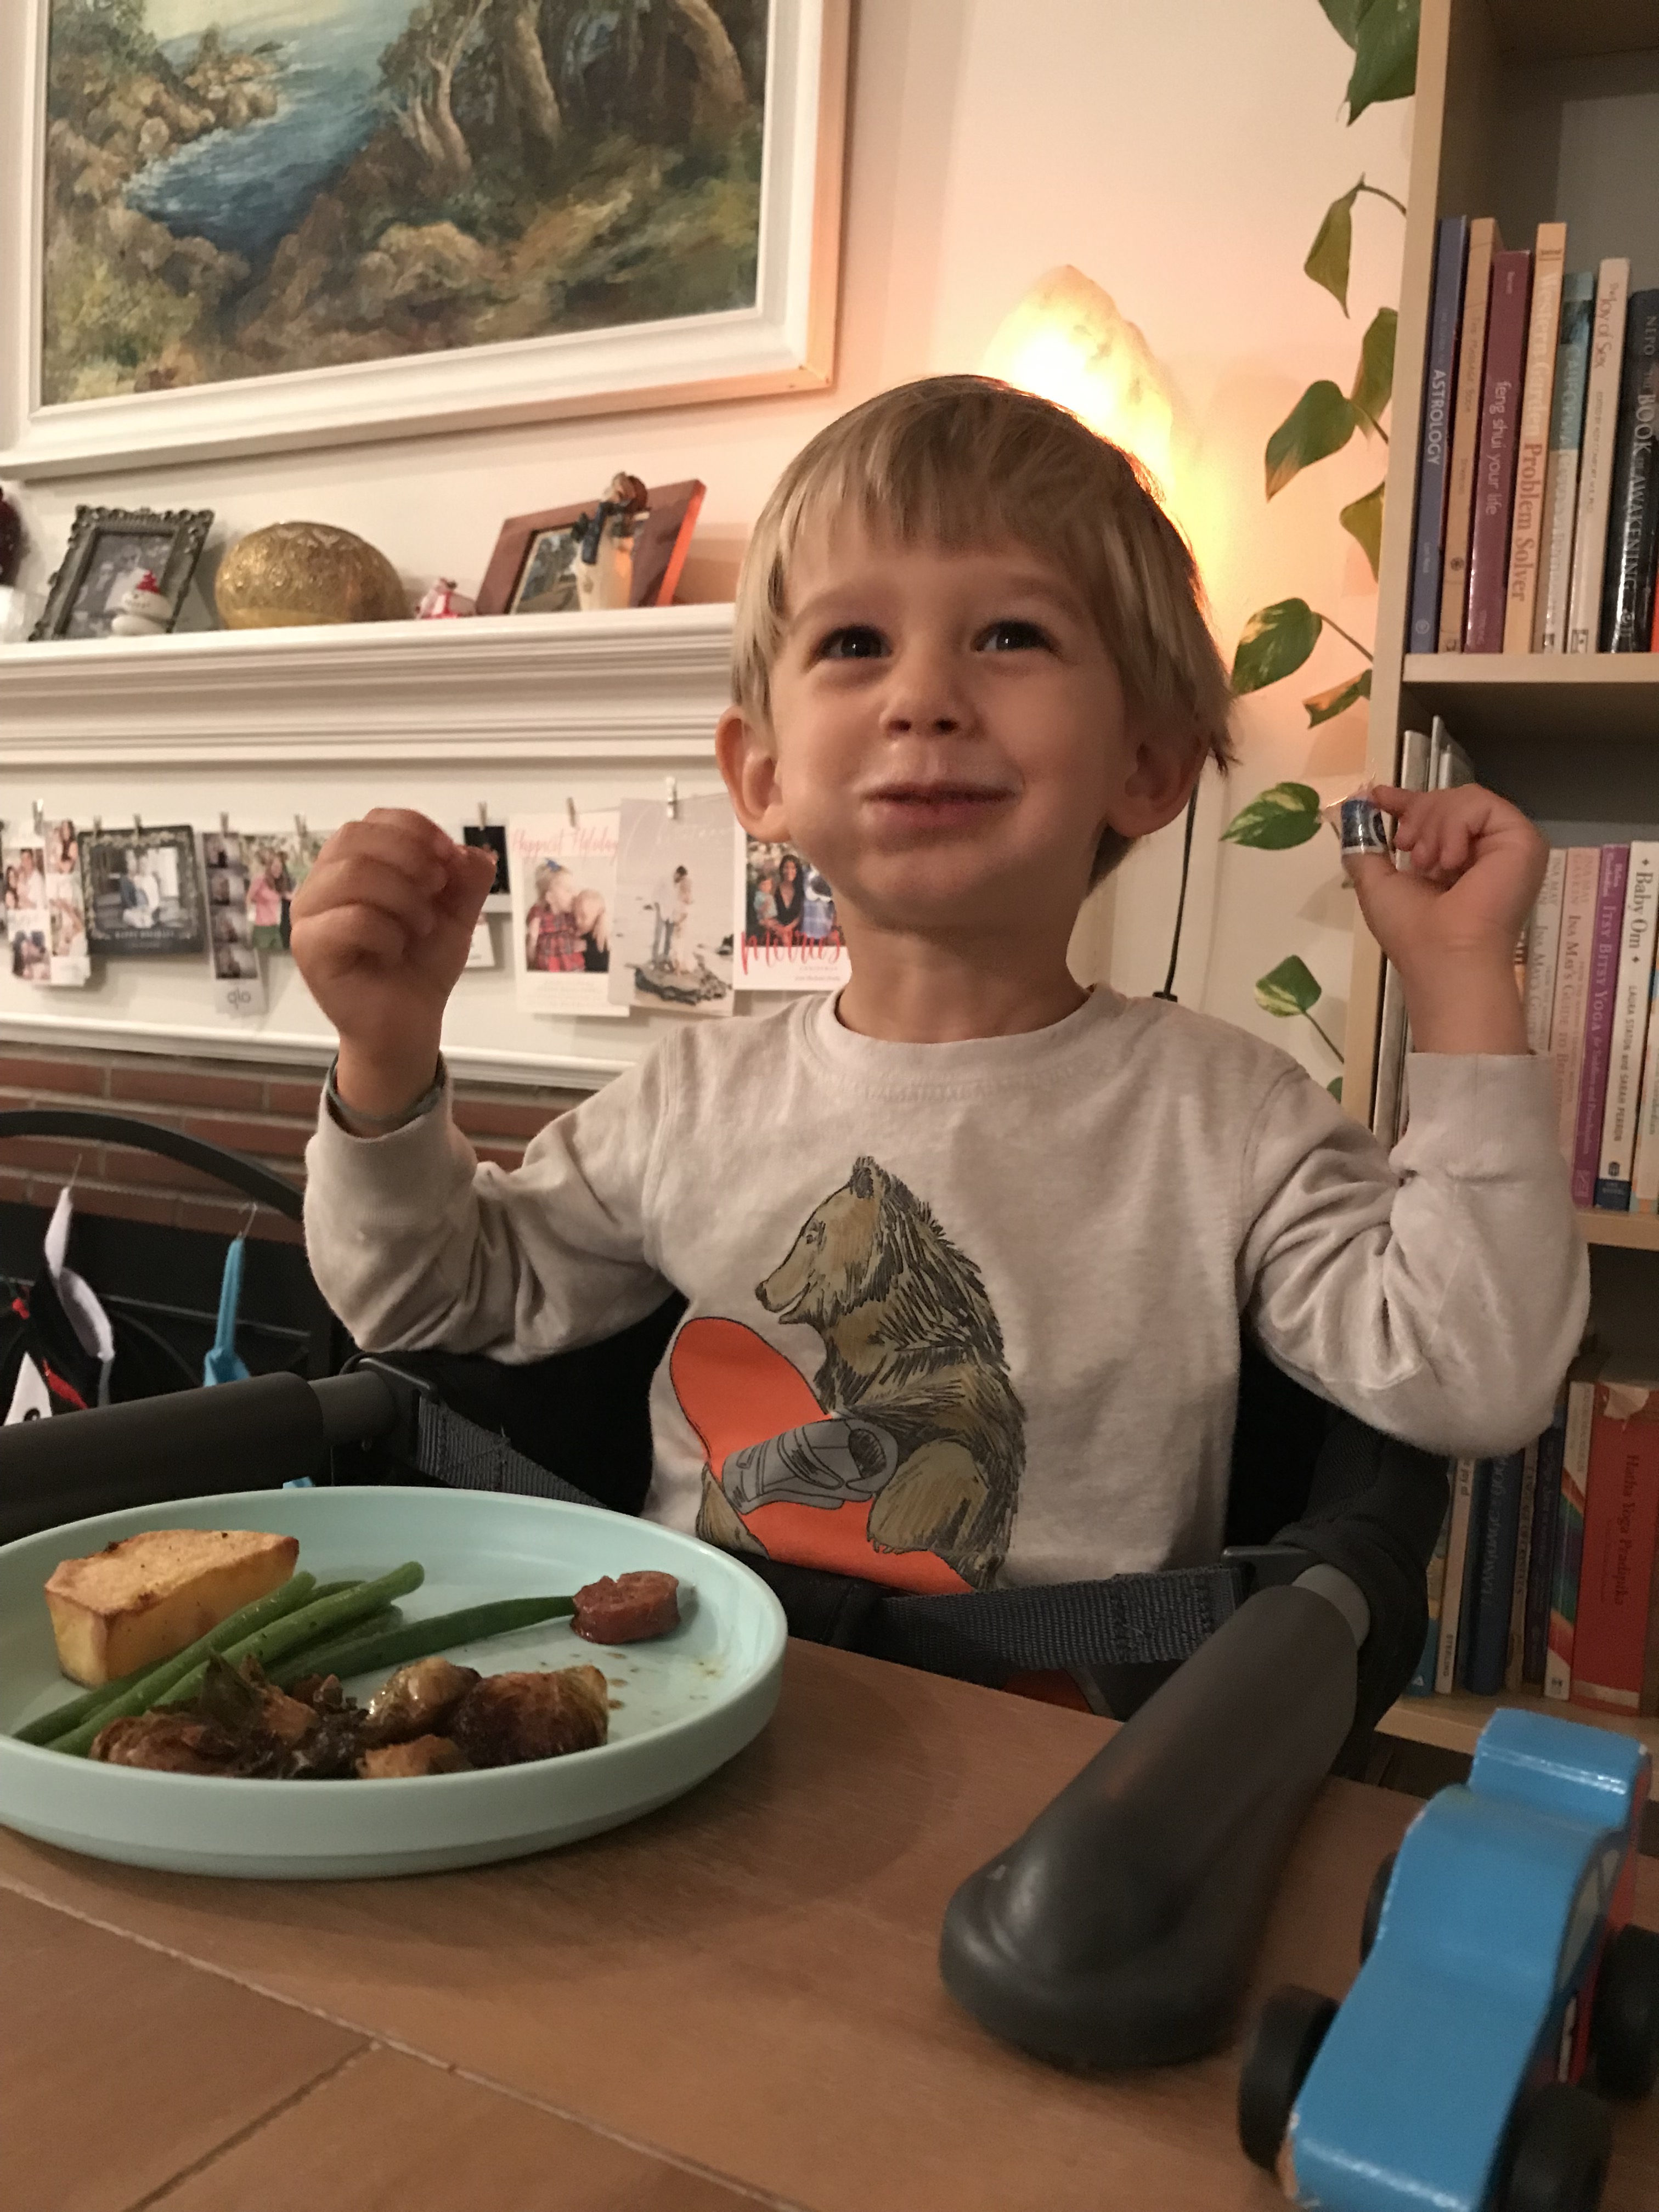
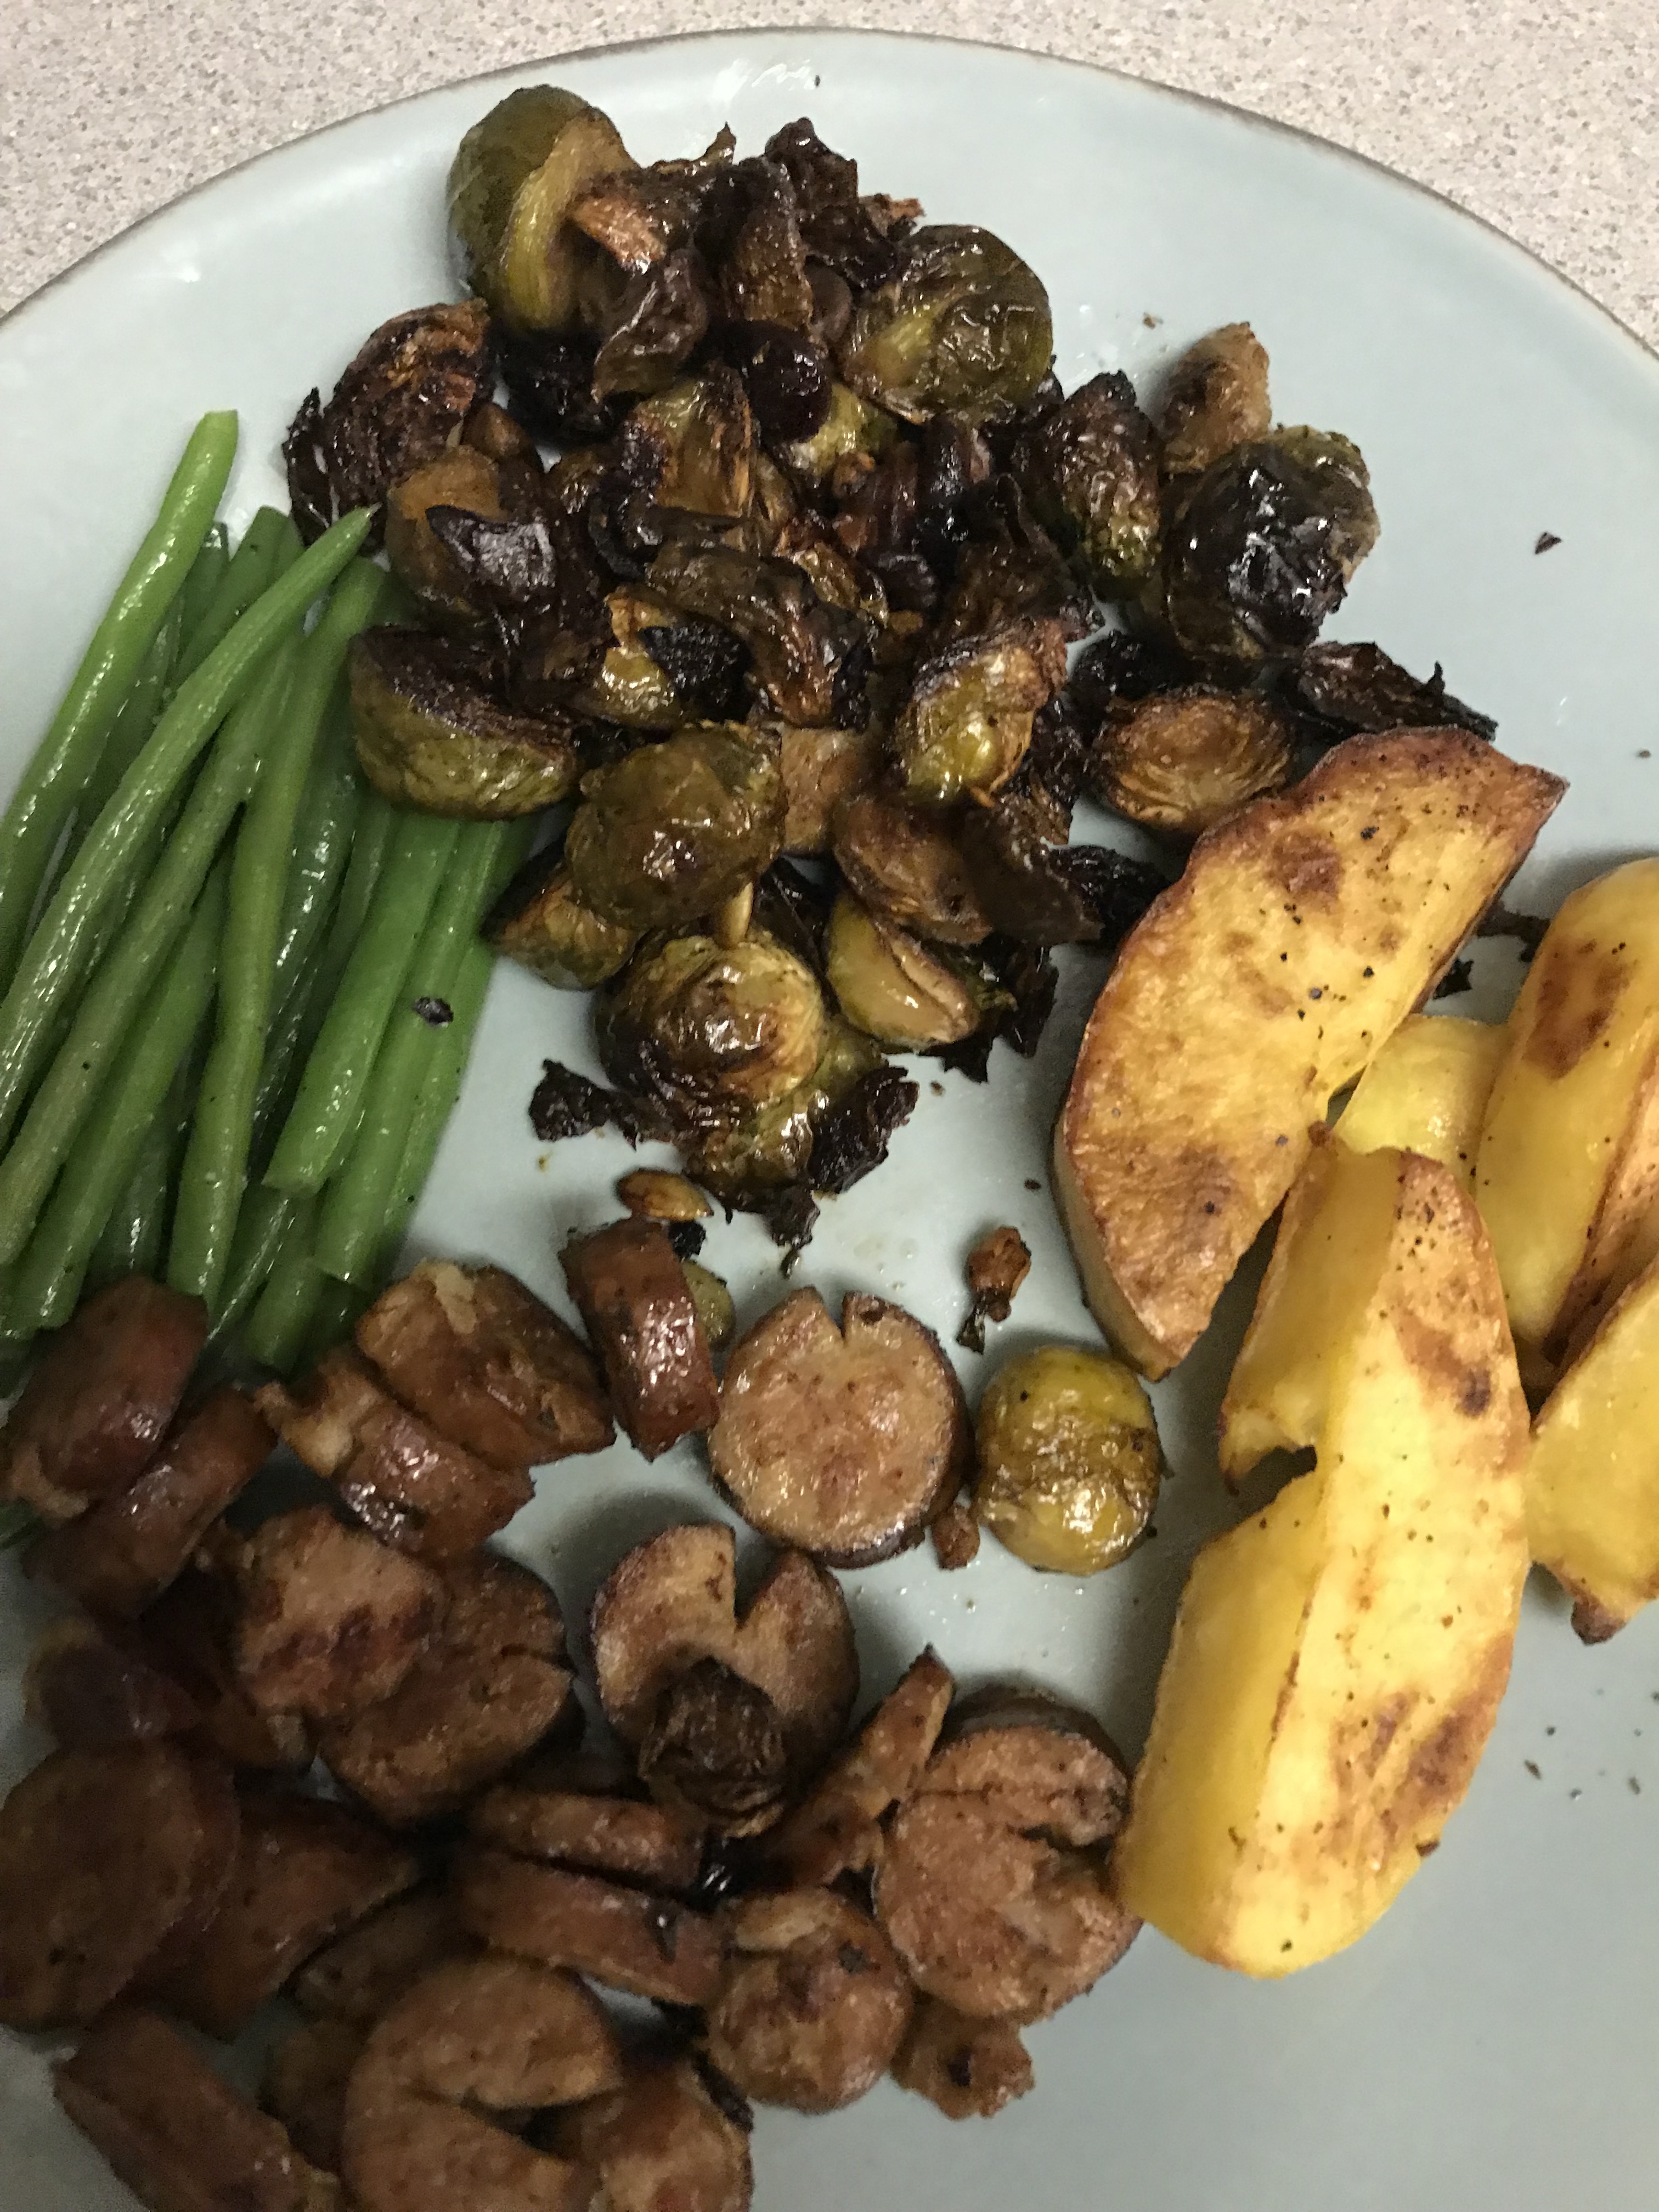
I love food and cooking and I want my son to appreciate it too. I have made it a point through his life so far (2 years 9 months) to expose him to all aspects of food. From growing and buying it to cooking and eating it. My hope is that he will understand how eating a healthy well balanced diet can positively impact his life. This method has worked pretty well so far as he is an adventurous eater, who loves fruits and vegetables. Tonight he ate green beans, roasted potatoes, chicken and brussels sprouts.
When he eats a protein, I say, “this will make you strong”. When he eats a vegetable, I say, “this will keep you happy and healthy”, when he eats fruit I say, “this will give you energy”. The carbs are never a problem for most kids. Getting young kids to eat rice, pasta or bread doesn’t really seem to be an issue for most parents. It’s the vegetables that are the most important for mental and physical development, but also the most challenging to get kids and even some adults to eat.
Matteo and Aven checking out the broccoli for bugs
Involving Matteo in the growing, harvesting and cooking of vegetables has really helped cultivate his love of vegetables and food in general.
Back to the brussels. They have been a chef/foodie thing for the last several years as it seems like just about every restaurant I go to has their own riff on this vegetable that when I was a kid, no one really ate.
I make it a point to order them as a side whenever they are offered. They are all a little different and I kind of like them all. My ideal brussels sprout side dish has a crunch from a toasted nut, a sweetness from a grape or berry and then the charred crispy vegetable, all of this married together with a sweet and tangy sauce.
Trying to perfect my homemade brussels sprouts to combine my favorite aspects of all those that I’ve had out and about has been a labor of love for the last several years. I’ve tested out different ways to cook them. From complex: steaming, pan frying and baking, to simple: baking at high heat. I feel like the other night I had a major breakthrough and wanted to share it with anyone else who enjoys these mini cabbages as much as I do.
First, I cranked the oven to 425 and prepped the brussels by trimming the ends, cutting them in half and rinsing them in the colander. Then I tossed them in olive oil with some salt and pepper and placed them flat side down on the baking sheet.
Brussels and Potatoes
I also cut potatoes into 1/2″ wedges and tossed them in olive oil with salt and pepper as well and put them on the same sheet. After 20 minutes, I flipped the potatoes and tossed the brussels around. Lately I have been adding chopped walnuts and cut up grapes, but since I didn’t have any, I added some of trader joes omega mix, which has dried cranberries, walnuts and pumpkin seeds and that turned out great.
After 10 more minutes, about 30 minutes total (checking because ovens vary) I took out the brussels and put them in a bowl. Then, I added honey and balsamic vinegar to the bowl and tossed everything together. I shook the potatoes around and placed them back in the oven for a few more minutes until they were crispy on the outside and soft in the middle.
In the past, I added balsamic vinegar and sugar while pan frying, but most of the time, while they would be tasty, they would be a little bit soggy. I found adding the honey and balsamic in the end is the way to go. They get absorbed into the brussels while they are hot. Finally I had something that was “blog worthy” because it was delicious AND super easy to make…
I steamed the green beans and then tossed with a little butter, salt and pepper. For the chicken sausages I cut them into little circles and pan fried them according to the package directions with a little olive oil. If you’re not into chicken sausages, I also make the same dish with salmon and it goes really well.
Matteo and I both enjoyed our dinner and ate everything on our plate. I came out from putting him to bed and Chelsea had come home and devoured her plate that we left for her and she said “that was awesome, I really loved it” and she doesn’t just throw out compliments. If she is saying it’s legit, then it truly is. It was an easy dinner to make and I got everything Organic from Trader Joes. Try it for yourself and let me know what you think.
Recipe for Brussels Sprouts
Brussels sprouts, olive oil, kosher salt
3 tablespoons balsamic vinegar
2 teaspoons honey
1/4 cup crunched up walnuts
1/4 cup grapes sliced in quarters
Heat oven to 425°F. Meanwhile, trim the bottoms from the sprouts and cut each one in half through the stem. Add olive oil and salt and pepper and toss to coat. Arrange them cut-side down on a rimmed baking sheet and place in oven.
Roast, for 15-20 minutes, then add walnuts and grapes or TJ’s omega mix and continue to roast until the leaves are dark brown and crisp and the undersides of the sprouts are browned, 25 to 30 minutes total. Take them out and put in a bowl and drizzle with the balsamic vinegar and honey and toss to coat. Serve immediately. Yum.
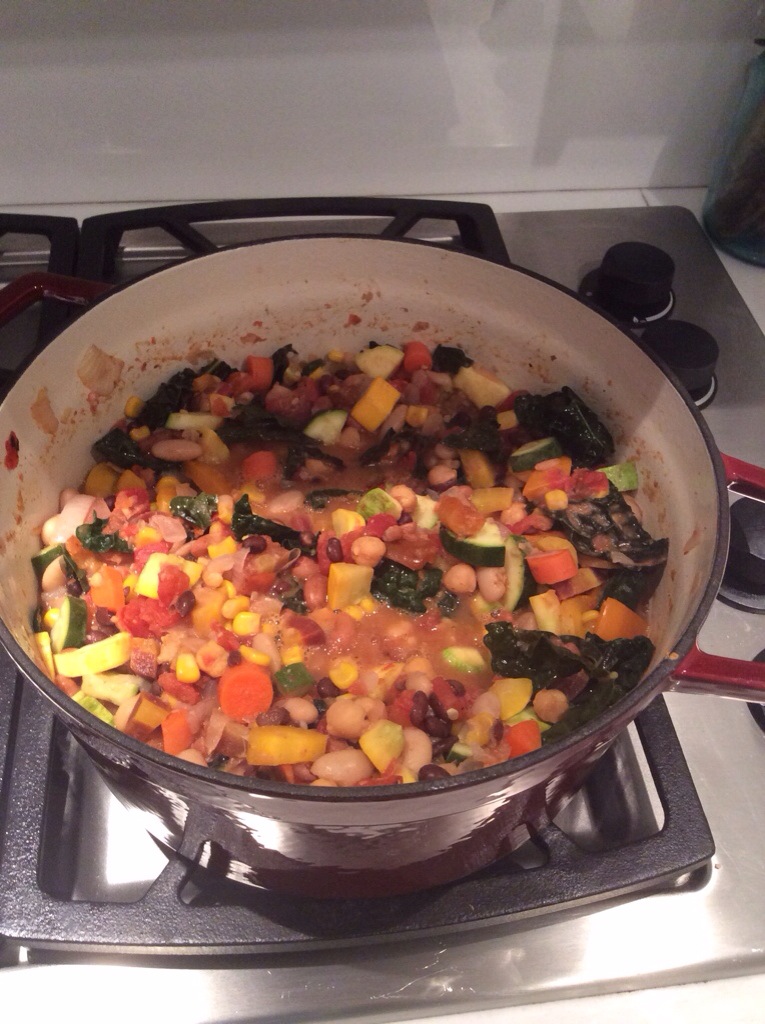
That’s what Chelsea said after tonight’s dinner… Homemade Veggie Chili…A healthy dish we have been trying to perfect over the last year. We make it every week or two. There are always leftovers and it’s great to take them to work the next day. It’s super easy to make and so now I’m going to share the recipe with you. Don’t you want to feel incredibly satisfied?! I know I do!
Part of the recipe is always the love and intention you put into the food you make. I love to cook and so that really helps…When I’m chopping vegetables, listening to music, I love it, it makes me so happy…making food for myself and someone I love. Somehow the love goes into the food. I don’t know how, I’m not a scientist, I just know it works. If you don’t believe me try it for yourself and you’ll see.
So here it is. I always try to buy organic for many reasons, one of which is its tastes better. I even used Kale from our garden. Here is everything I put in…
I first chopped up the onion, garlic, carrots and peppers and put them in a pot on medium to low heat with olive oil. After they all softened up I added a little salt and cumin and chili powder. Then I added the zucchini, squash, kale and all the beans plus one cup of veggie broth. Then another dash of the three spices. I let this go on with the heat on low for about 10 minutes and then Chelsea called. She was on her way home from teaching her prenatal yoga class. She said to add the corn and diced tomatoes cover it and let it simmer until she got home to give it the final flavoring… That’s her specialty. She has the palate of a sommelier… I’m just the sous chef. She always gives our dishes the final touch. It’s about a 20 drive home and it simmered the whole time. I went up to the roof, watched the sunset and finished my Moscow Mule…
Chelsea arrived home and added a little more cumin, chili powder and salt and said we could have used another can of the diced tomatoes. So add that to your recipe if you want to make it more like a true chili. She said ours looked liked a goulash. Well, however it looked…
It tasted delicious and left us both incredibly satisfied…
Right in the center of my vision board are the words Farm to Table. The further along my yoga path I have come, the more this means to me. Eating consciously. Locally grown, seasonal, organic…you know, the good stuff.
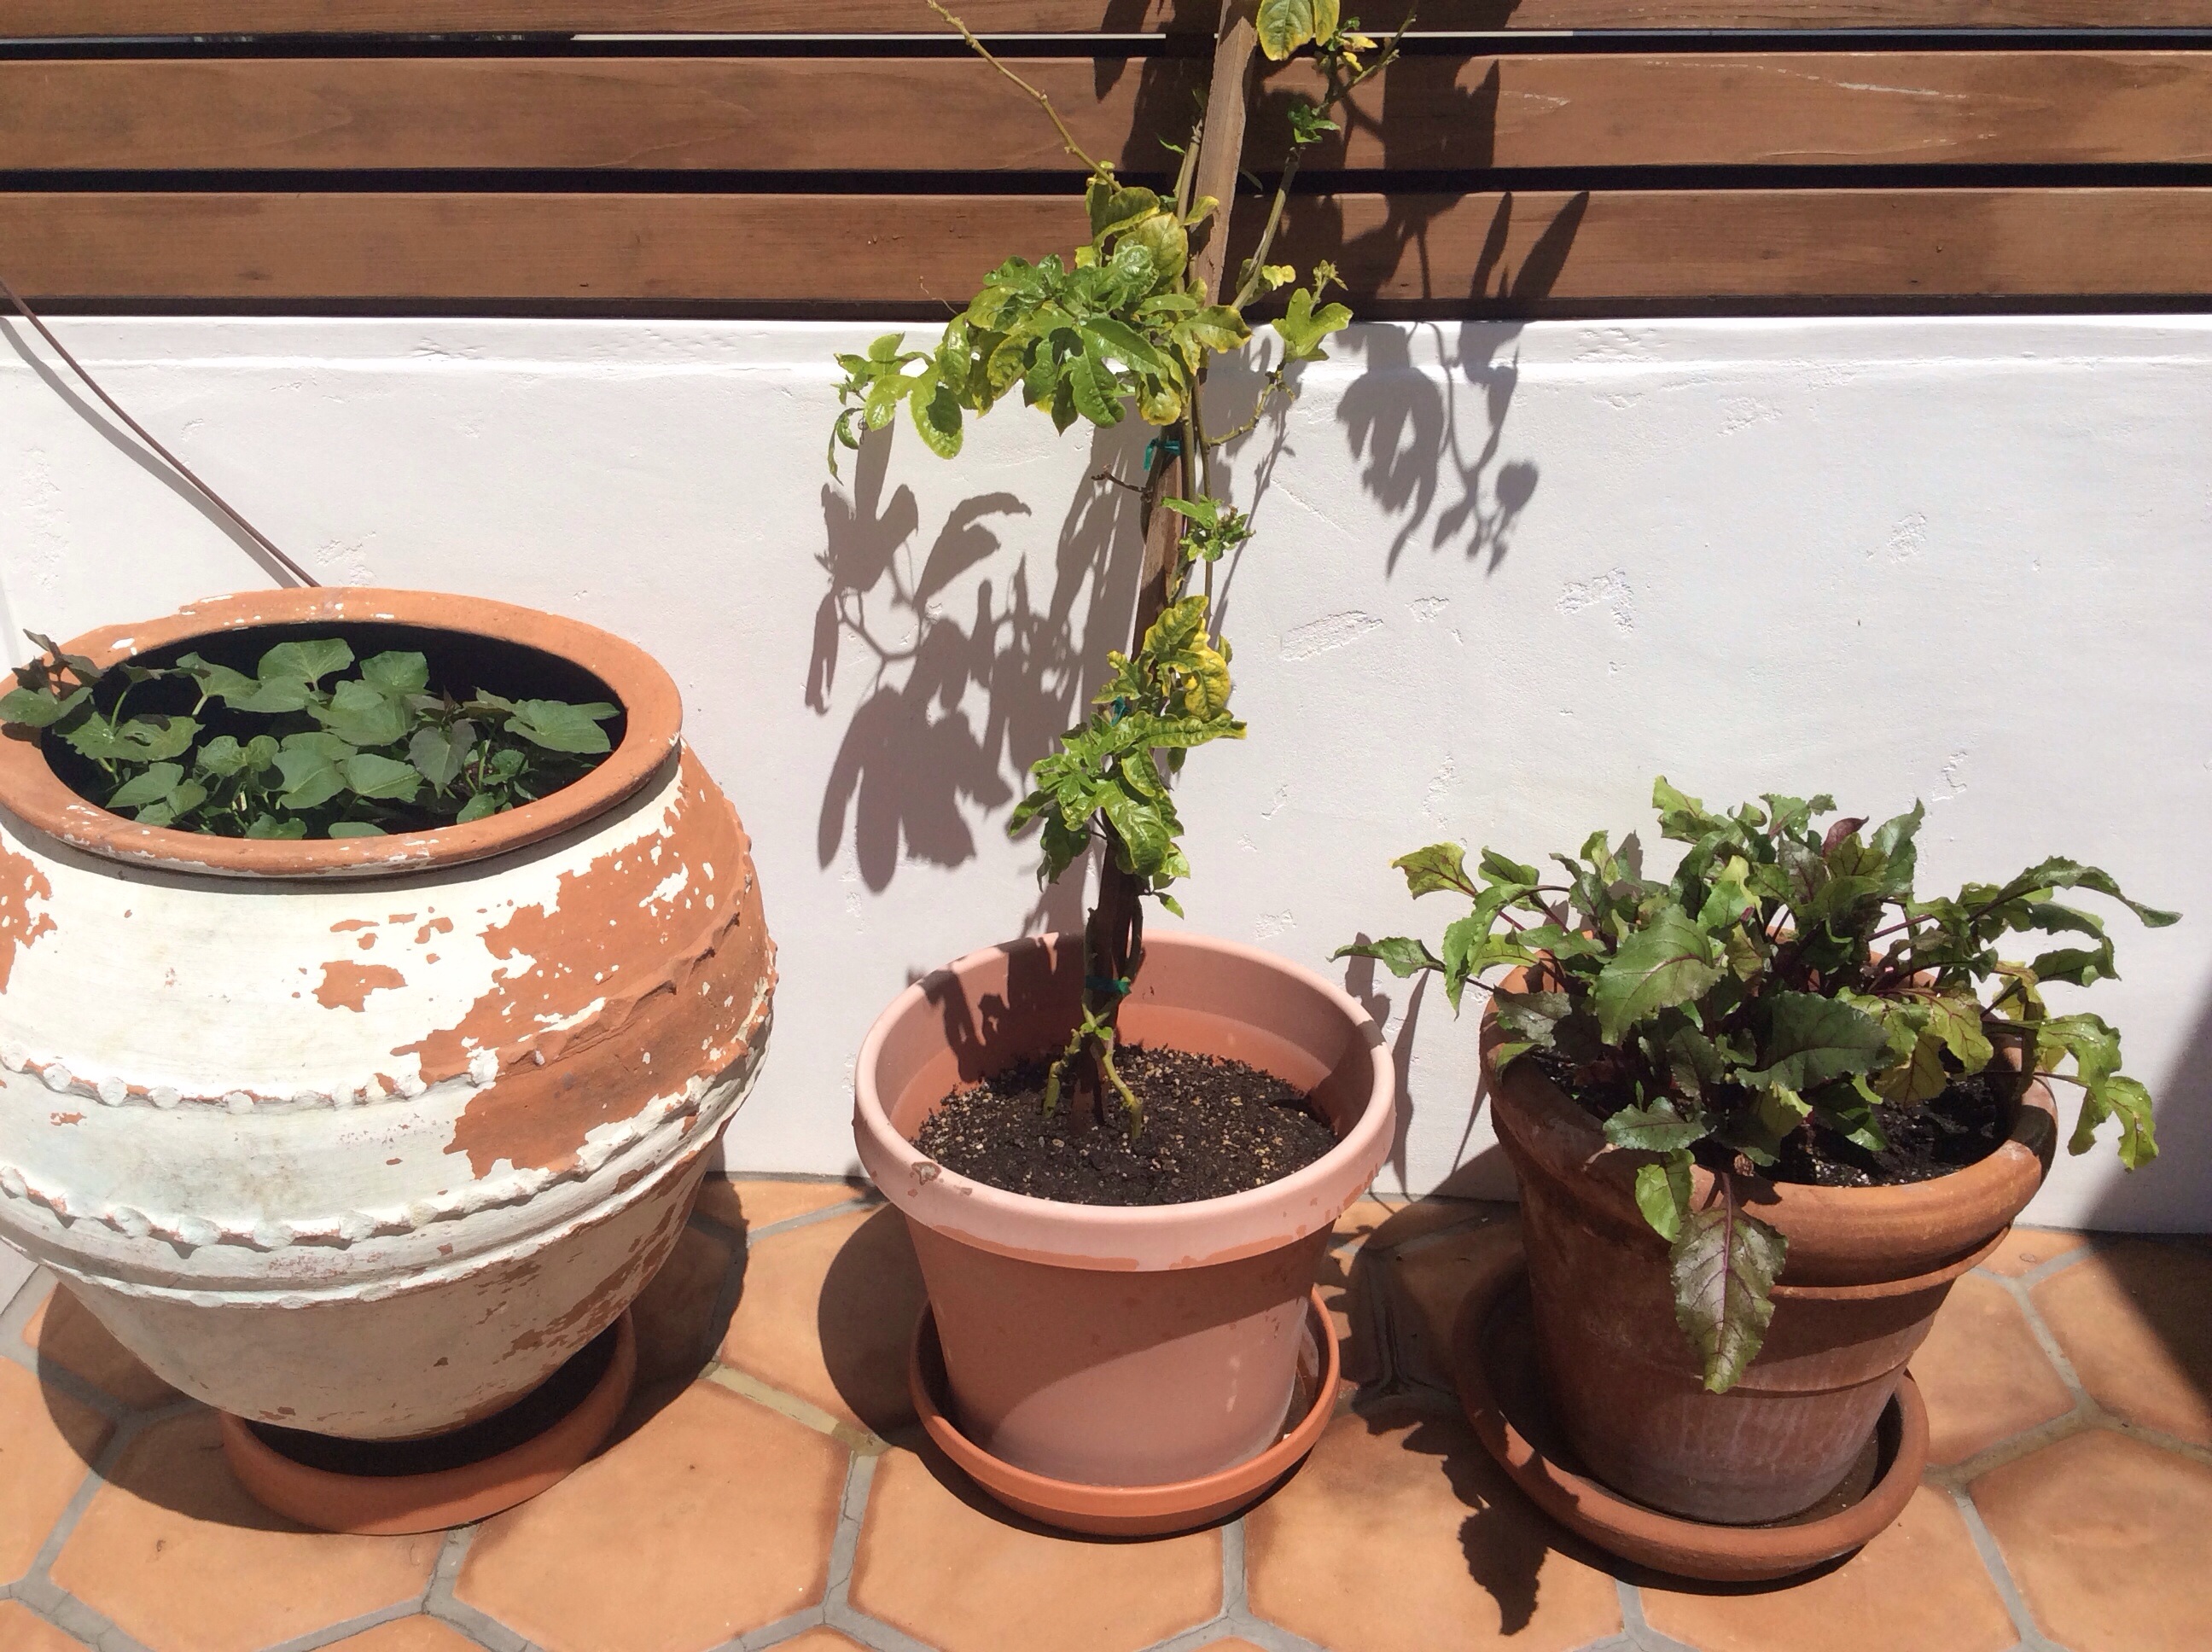
Since I live in Manhattan Beach, where outdoor space is hard to come by, having a farm is not an option. There is very little land here that is not beach or home. Few people even have yards. That means if you want to enjoy farm to table you rely on the farmers markets, which are amazing. However, my intention when I put it on my vision board was to have the farm myself. My grandfather was a farmer and he advised me at a young age to not take up farming as a career. So actually what I really meant when I set it as an intention is to grow my own food…at least some of it. Garden to Table is more accurate. With limited space you have to be creative in order to make this happen, but I’m here to tell you, it can be done!
We are fortunate enough to have a balcony, so we can grow things in pots.
Sure it would be nice to have a big yard with a garden, but you do the best you can with what you have. As a lover of food, I can honestly say, I am hard pressed to find something more satisfying to my taste buds and to my soul, as food that I plant, take care of, harvest, cook and eat myself.
I believe there are several factors for this. First of all it’s 100% organic! Next, there is hardly any carbon footprint. Except for when Chelsea and I went to the Garden Center in El Segundo to get the seeds and soil. Third, it’ seasonal and finally they were grown and cooked with love and I truly believe this has a positive effect.
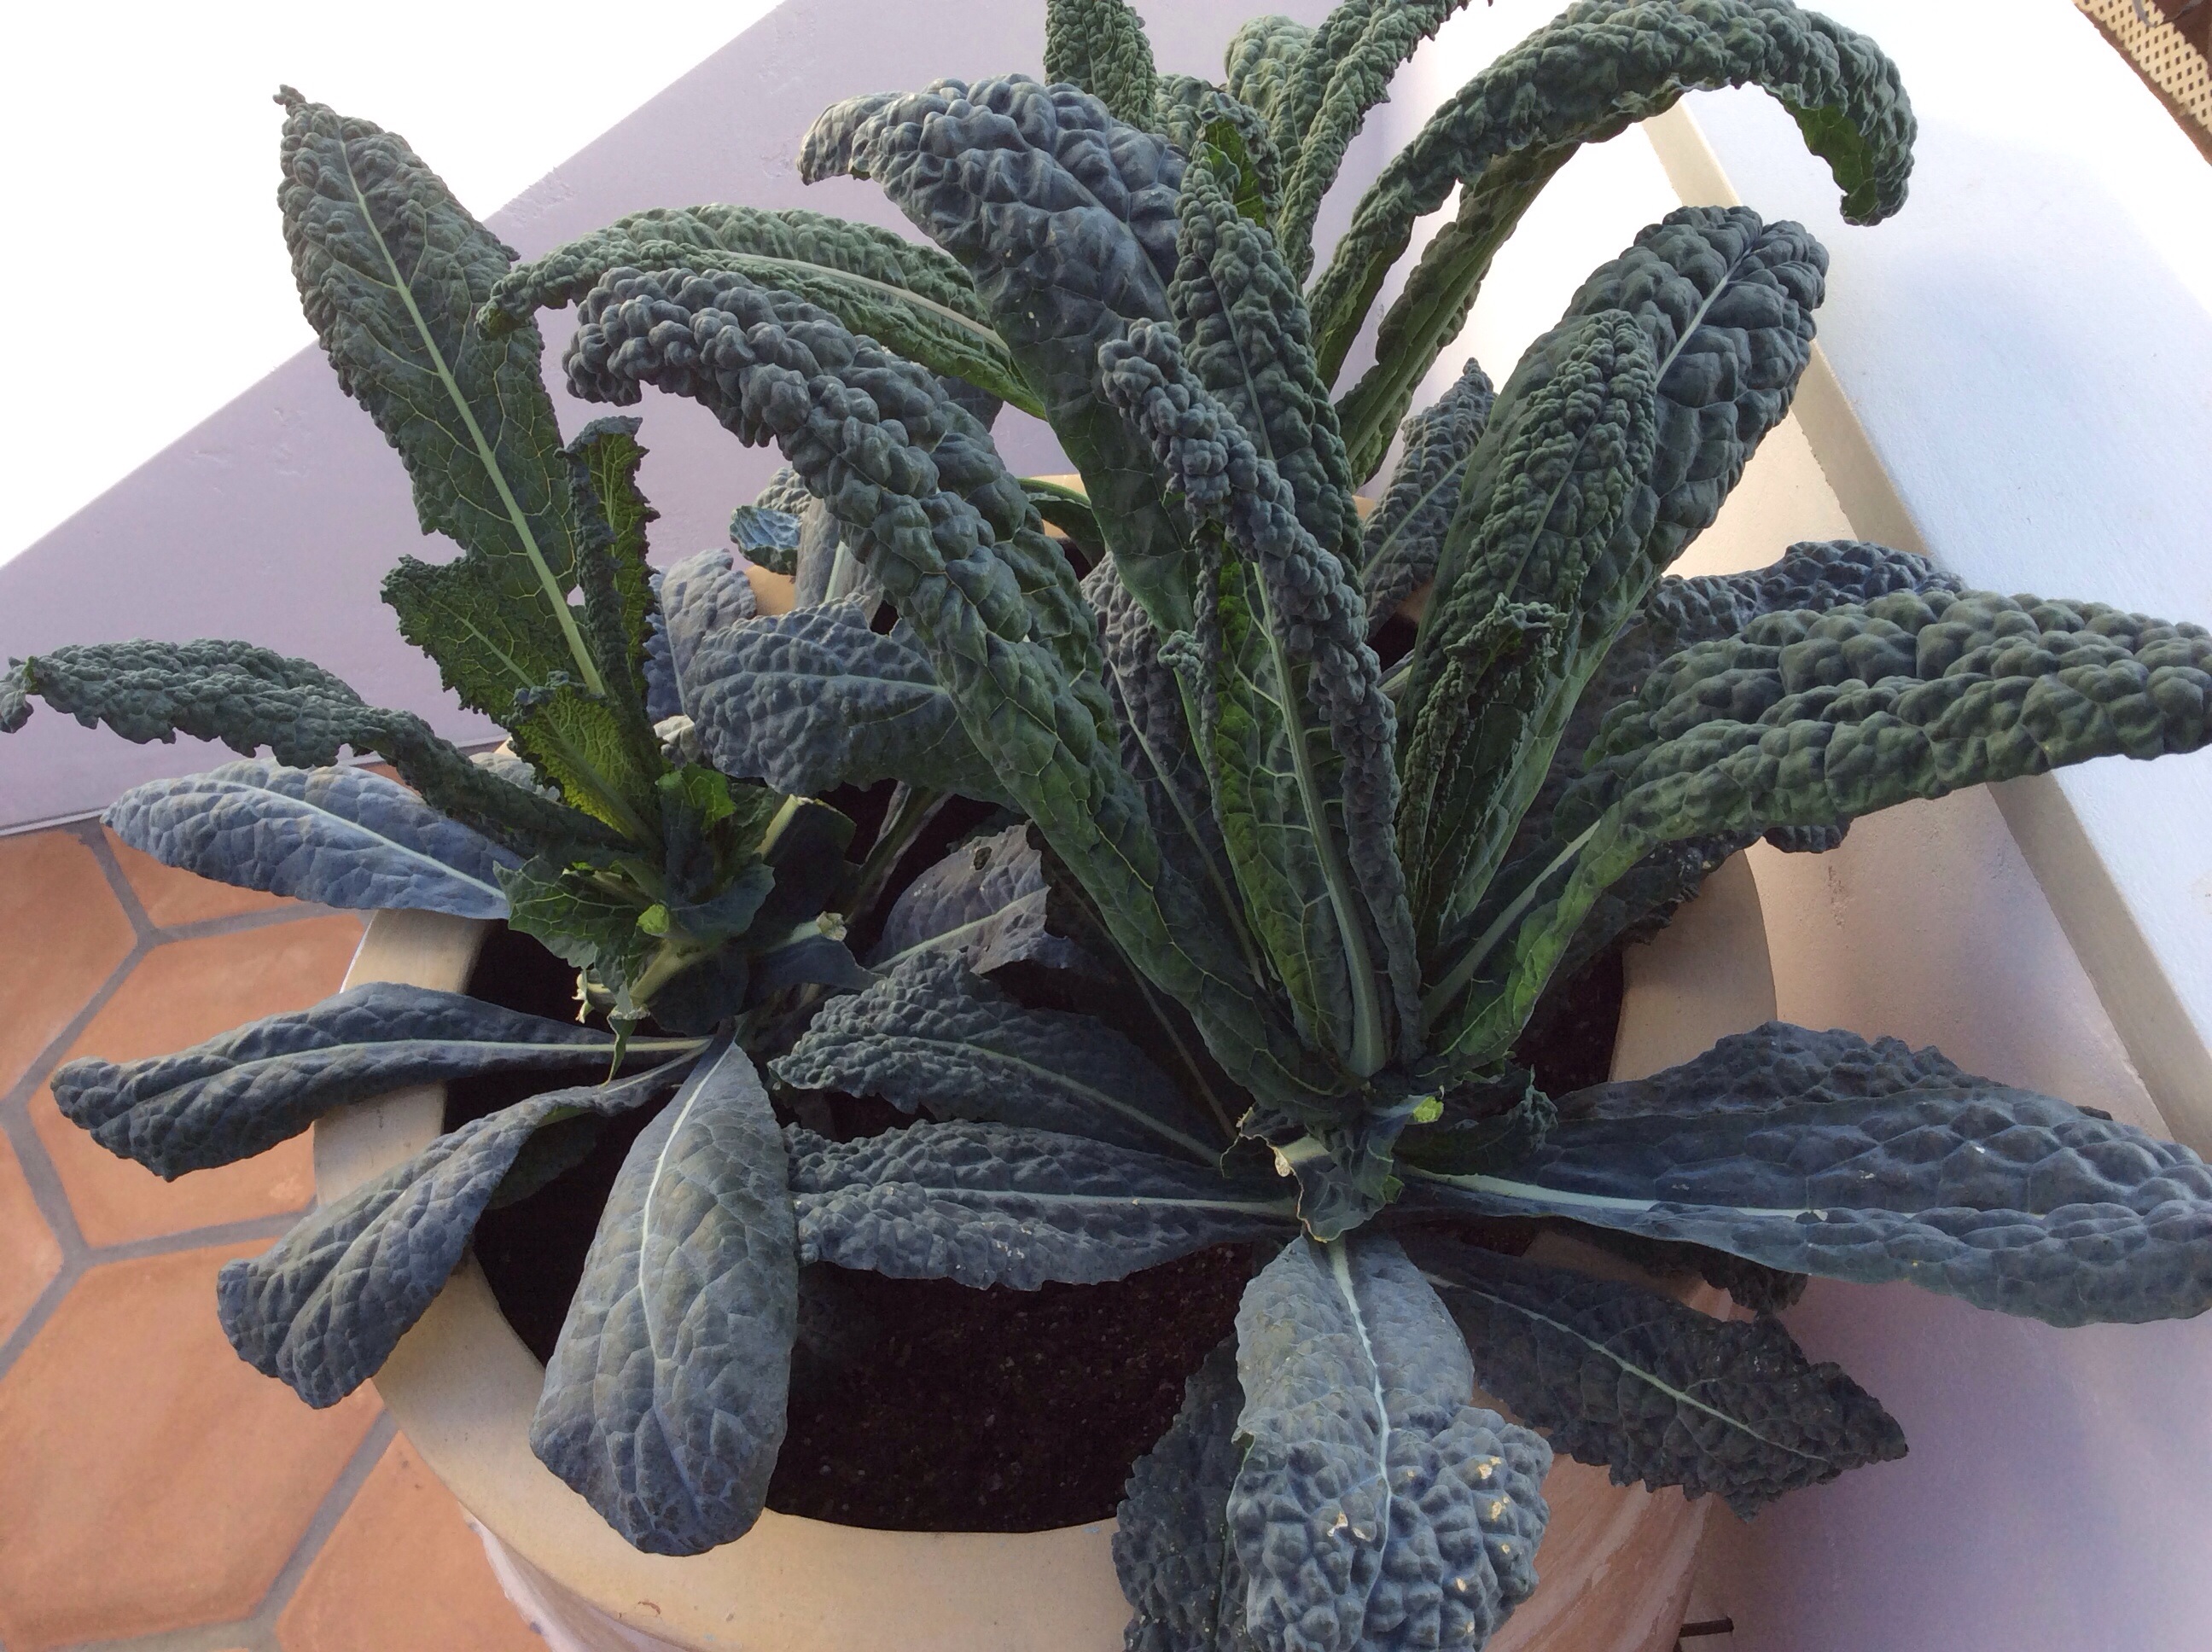
We planted the beets and kale out on our balcony, along with some sweet potatoes that our friend Berit gave us. I have been on a morning meditation kick and I usually do it outside near the plants. It has been a nice practice, spending a few minutes sitting quietly in the morning, connecting to my breath, listening to the birds sing amidst the drills, saws and hammers from the construction next door. Then getting up and looking after the plants. Watering them and watching for bugs, trimming off the dead leaves, etc.
Meditation and gardening have this in common…to get the most benefits, consistency is key. You can’t just meditate once or water the plants once and expect results. However, when done on a consistent basis over time the benefits of meditation are a greater sense of peace and joy. The benefits of gardening are beauty from the flowers and food from the plants. So, after just a few weeks, it was time for a joyful food harvest. I decided to make Kale chips and beet greens with my bounty.
The beet greens were surprisingly delicious and easy to make. I cut the leaves in half and chopped up the stems into tiny quarter inch pieces. Sometimes I toss them in the skillet with a little olive oil, salt and pepper and after a couple of minutes they are sautéed and ready to enjoy. Tonight I added them to a stir fry Chelsea was making using coconut oil and veggies from the farmers market.
The kale chips were almost just as easy and even more delicious. I used my friend Katie B’s recipe. Katie Bressack Heat the oven to 425, trim off the stems and toss the kale lightly in olive oil, sprinkle with salt and spread onto a baking sheet.
Place into the oven and keep an eye on them. They only take a few minutes and the difference between good and un edible happens fast. When they are crisp, they’re ready. Crunchy and yummy. What a great way to enjoy veggies!
Both the kale chips and beet greens satisfied my taste buds and my soul. The fact that I planted, tended to, harvested and cooked, made them even better.
Let me start by saying, I LOVE Barbecue Sauce! Maybe it comes from my roots in Arkansas, or my upbringing in North Carolina, where the Southern folks love them some BBQ. But, I have always loved the sauce. There are so many different kinds too. Even different regions of the state have different flavor profiles. Some are sweeter, some more tangy , but all just a little bit different. Have you ever noticed, there is basically just one ketchup, but there are a wide variety of sauces with the title BBQ attached to them. Over the years, I would always order a side of it whenever I was at a new restaurant. As a result, I have tried hundreds over the years and my love of cooking inspired me to make my own. I have modified this recipe over the years, so sometimes it is sweeter and sometimes more tangy, but I love it and rarely do I find one out on the town or even in stores that I like better.
The great thing is, it’s easy to make and can be made from organic ingredients , which is important to me. I look at the ingredients of many of the popular versions in stores and they have high fructose corn syrup as one of the first ingredients. None of that here, so you can slather it on whatever you want. One time Chelsea came home to her roommate eating it with rice. She said “I just wanted to eat this sauce”!
So, at the request of my friend Val, I’m sharing this recipe on here for anyone to try. Have fun with it and feel free to make modifications depending on your own preferences. This one is a little sweet, a little tangy, a little spicy and full of umami. (Which is that pleasant savory taste that helps make ketchup so satisfying) http://www.umamiinfo.com/2011/02/What-exactly-is-umami.php
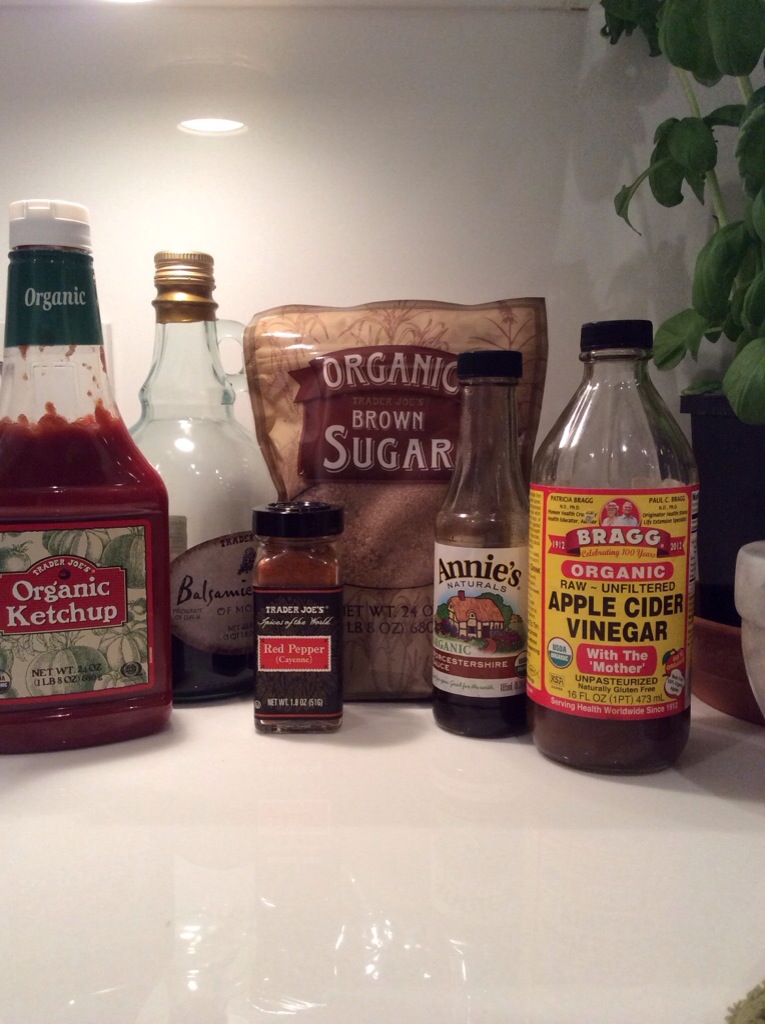
For Matt’s homemade BBQ sauce 2014 edition, mix together
1 cup organic ketchup
1 cup organic brown sugar
3 tablespoons apple cider vinegar
3 tablespoons balsamic vinegar
2 tablespoons Worcestershire sauce
1/4 teaspoon cayenne pepper
>
The key is then to cook it down, meaning adding mixed ingredients to a skillet and cooking it on low heat for about 20 minutes, stirring it occasionally, especially as it begins to bubble. This will give it that stickiness that takes it to the next level for my taste buds, it’s where the umami comes out. Then after it cools a little, I put it in a glass jar and either give it away to someone I love (I’m bringing some to yoga tomorrow for you Val) or enjoy it on everything from salmon to grilled eggplant. I even use it on our home made pizzas.
>
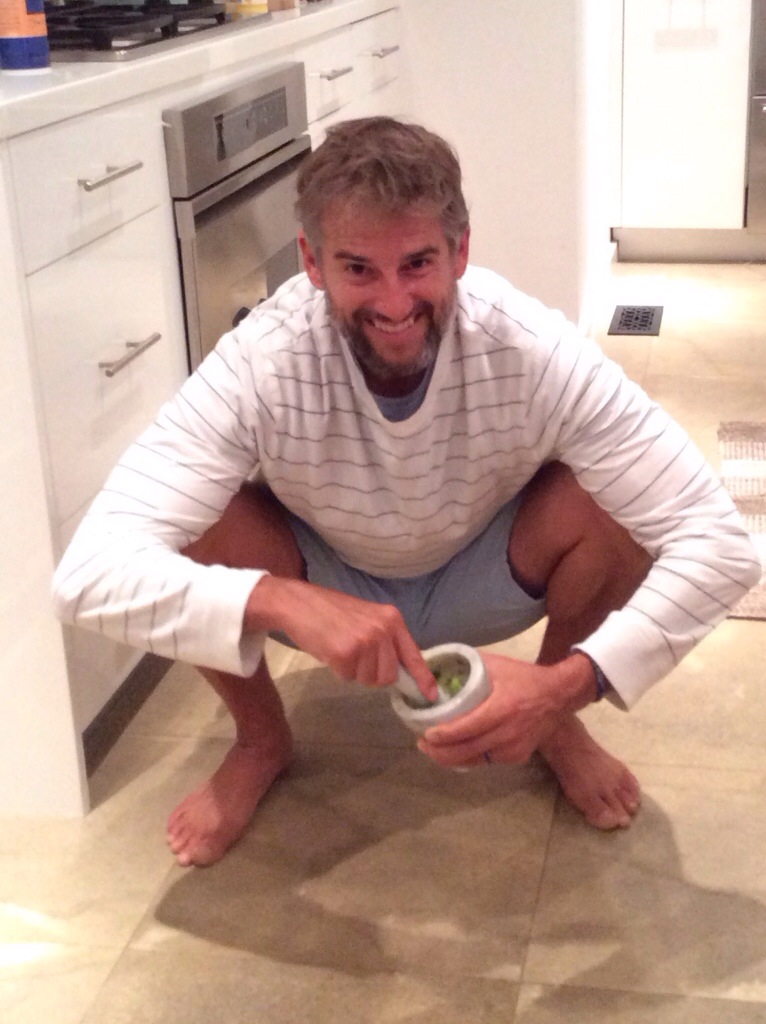
Oh yeah, the beverage… It’s a mock tail. Non alcoholic cocktail. Fun to drink and easy to make. Chelsea and our friend Laurel made some ginger syrup. I used a little of that, along with soda water. I then muddled up fresh basil from a basil plant we have next to the sink along with lemon from a tree outside, mixed it all together while the sauce cooked down. Delish!
>
This is the yoga pose for today’s post. It’s called Malasana, basically a squat. Great to do when your muddling. This pose helps my low back feel better the way it stretches and builds strength. I have had two yoga teachers say that “Cultures that spend time in this position have fewer back issues” I can believe that. Since I’ve been doing it, my back feels great. Try to do it for one minute per day, followed by a forward fold, muddler not needed to perform this pose;)
>
Tonight Chelsea and Berit went to a Norwegian party. Berit is part Norwegian and recently won a reality show based in Norway with other Norwegian Americans called Alt For Norge. She was our upstairs neighbor at the time and we got to experience her being gone for two months and then coming back and keeping the fact that she won a secret from us for two months after she got home, while we all curiously watched the show. Convinced that she came in second or third. It was quite brilliant on her part actually. It made for an exciting run! So now she is a bit of a celebrity in that “world” and Chelsea is reaping the benefits, by being able to get dressed up and go to a fun party.
>
I had a fun night too! Doing some of my favorite things, cooking and eating.
Tonight’s dinner was easy to make and delicious to eat. First, I thinly sliced purple potatoes, yellow squash and green zucchini and threw them in the same bowl and tossed them with olive oil and sprinkled salt and pepper and crushed up Rosemary and sage with my hand and sprinkled it over and mixed around and placed on a baking sheet and put it in the oven to bake at 400 degrees.
>
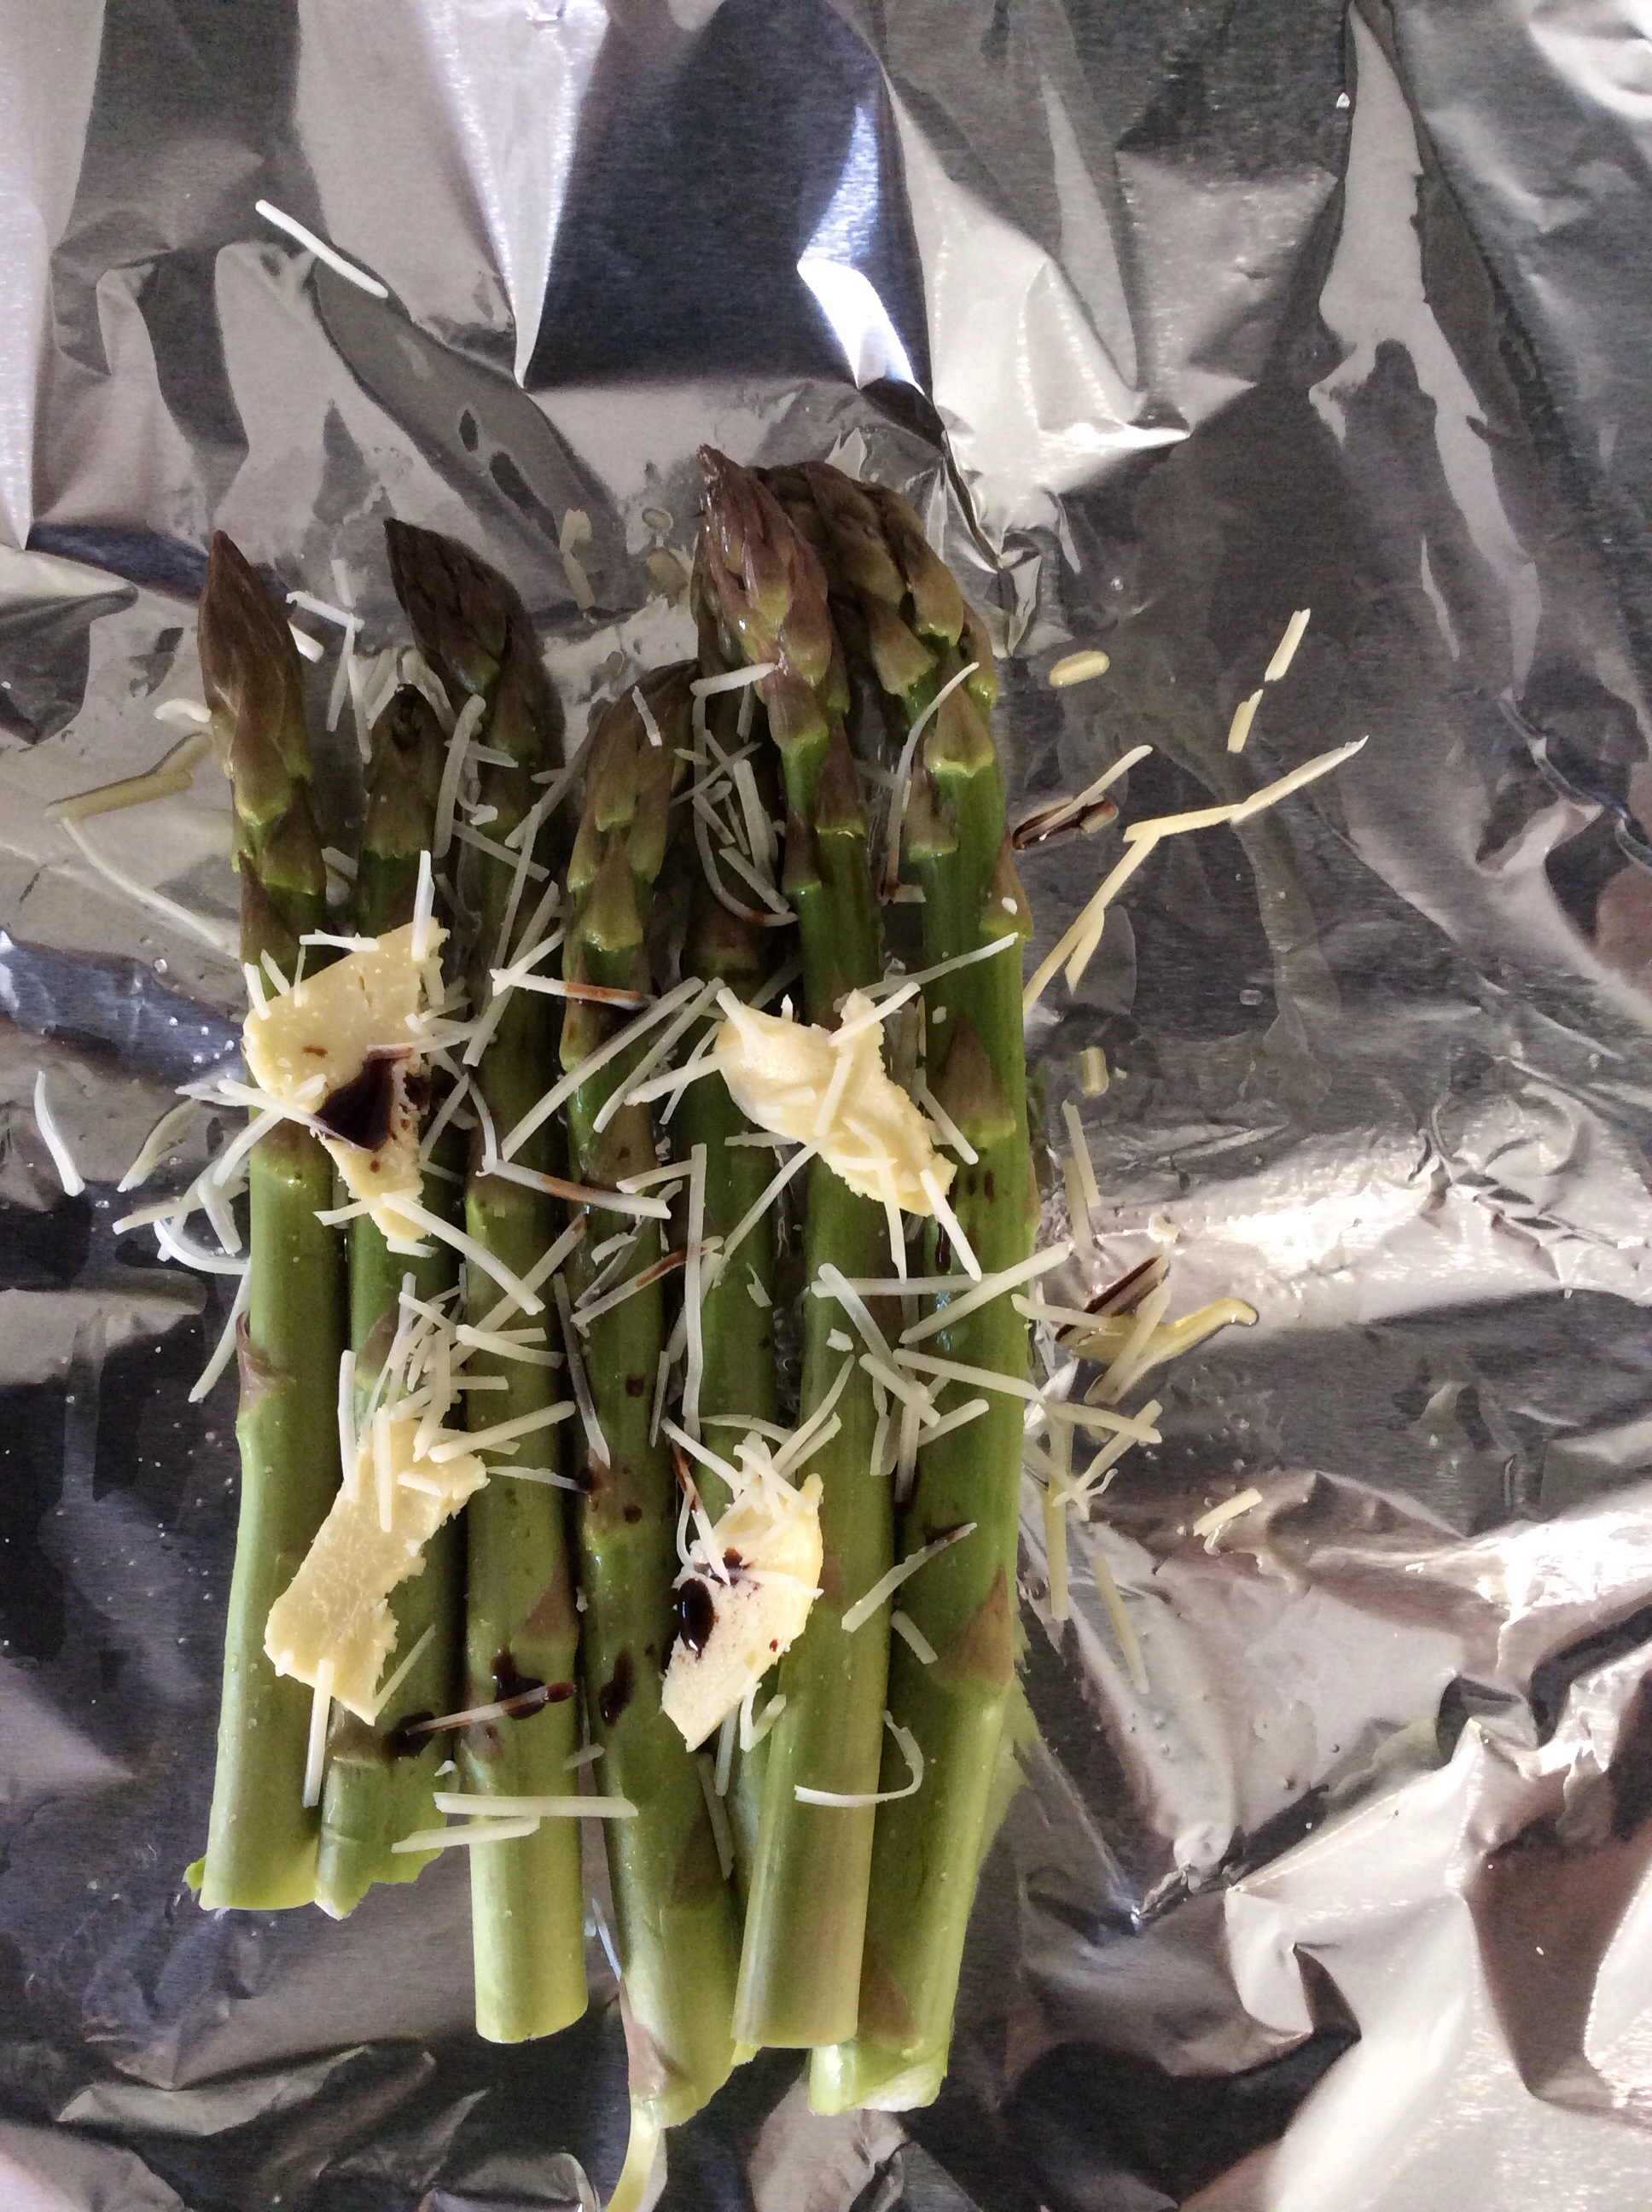
I also snapped off the ends of asparagus spears (locally grown and organic as is all of my produce) put them in foil with butter, Parmesan cheese and balsamic vinegar.
I also added my homemade BBQ sauce on salmon and put those two on the grill>
The end result…
BBQ salmon with asparagus, zucchini, squash and purple potatoes
After years of writing all my random thoughts and inspirations into paper journals and after being inspired by my friends and fellow bloggers Gabby from Cause We Can Events, Jessica form Life, Love, and Yoga; and Peggy and Megan from Curry Girls Kitchen…I’ve decided to share with those who care, my thoughts and inspirations on everyday life. In the hopes that someone, somewhere, will be inspired to live a better life, be a better person, and have a positive impact on the world around them.
I will do this through the lens of Yoga, Love and Food. Three things that I am passionate about. Three things that positively impact my life. I love yoga (teaching and practicing), I love Love (making and spreading), and I love food (growing, cooking and eating). So here goes…